


Editor's Note: This post was written by Kelsey Leftwich from Scope3.
Introduction
As a senior software engineer at Scope3, I have witnessed firsthand the transformative power of CommandBar in enhancing the functionality and user experience of our Collaborative Sustainability Platform. Now, I am thrilled to share my insights and experience on integrating CommandBar into your Next.js project. In this tutorial, I will guide you through the process of adding four features into a sample project using CommandBar.
Source code
You can grab the source code for this demo below if you want to follow along.
https://github.com/kelseyleftwich/commandbar-demo
Explore the live demo of the CommandBar integration in our example NextJS project here.
CommandBar in the wild
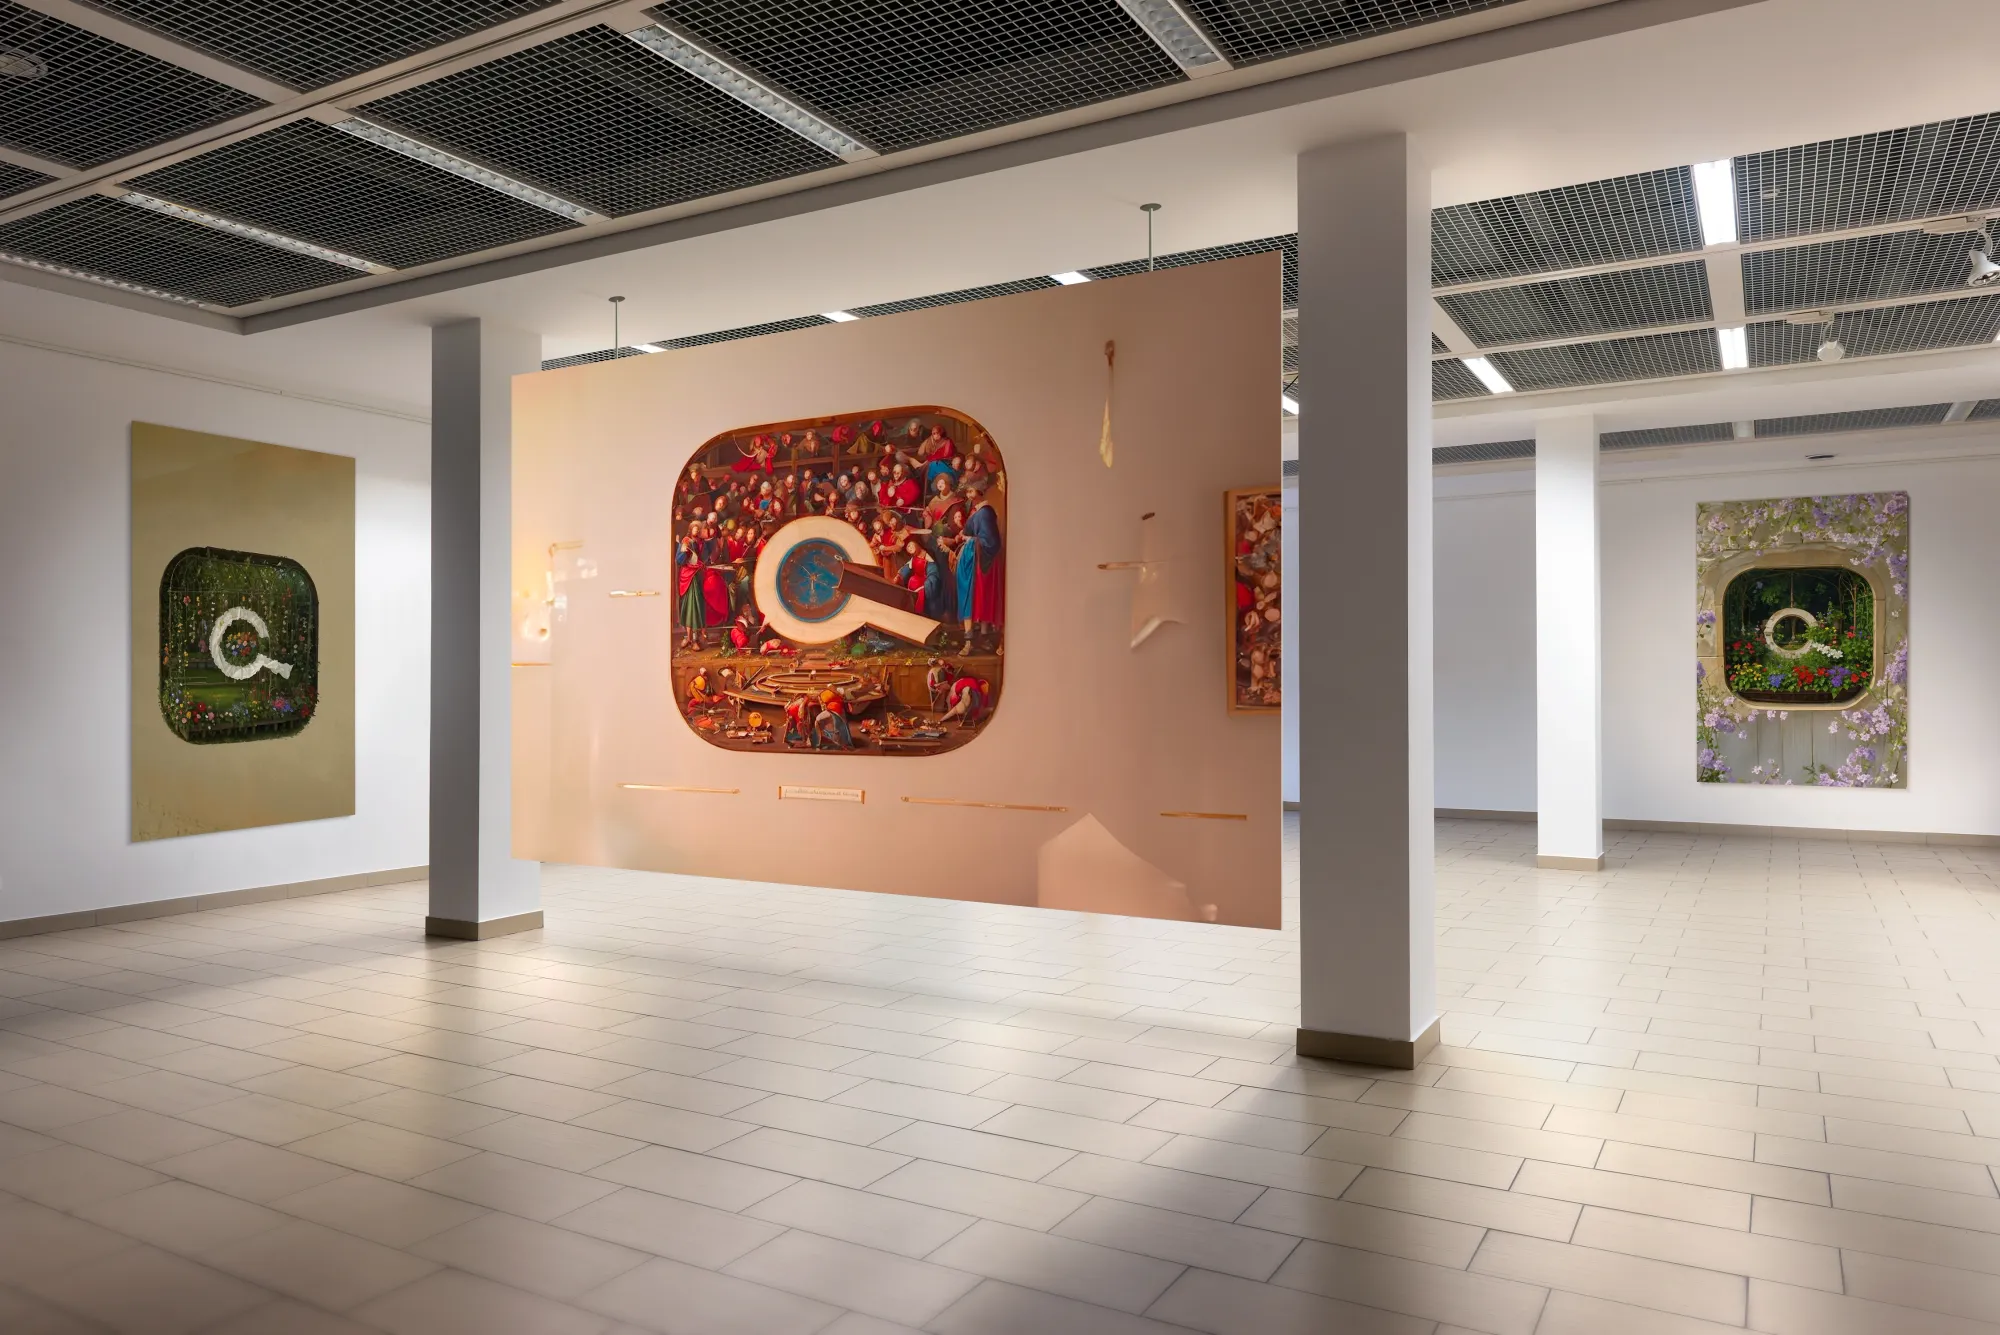
Explore CommandBar in action on our Collaborative Sustainability Platform at Scope3.com. Take a tour of the interface and see how it streamlines user interactions and enhances overall accessibility.
Example project
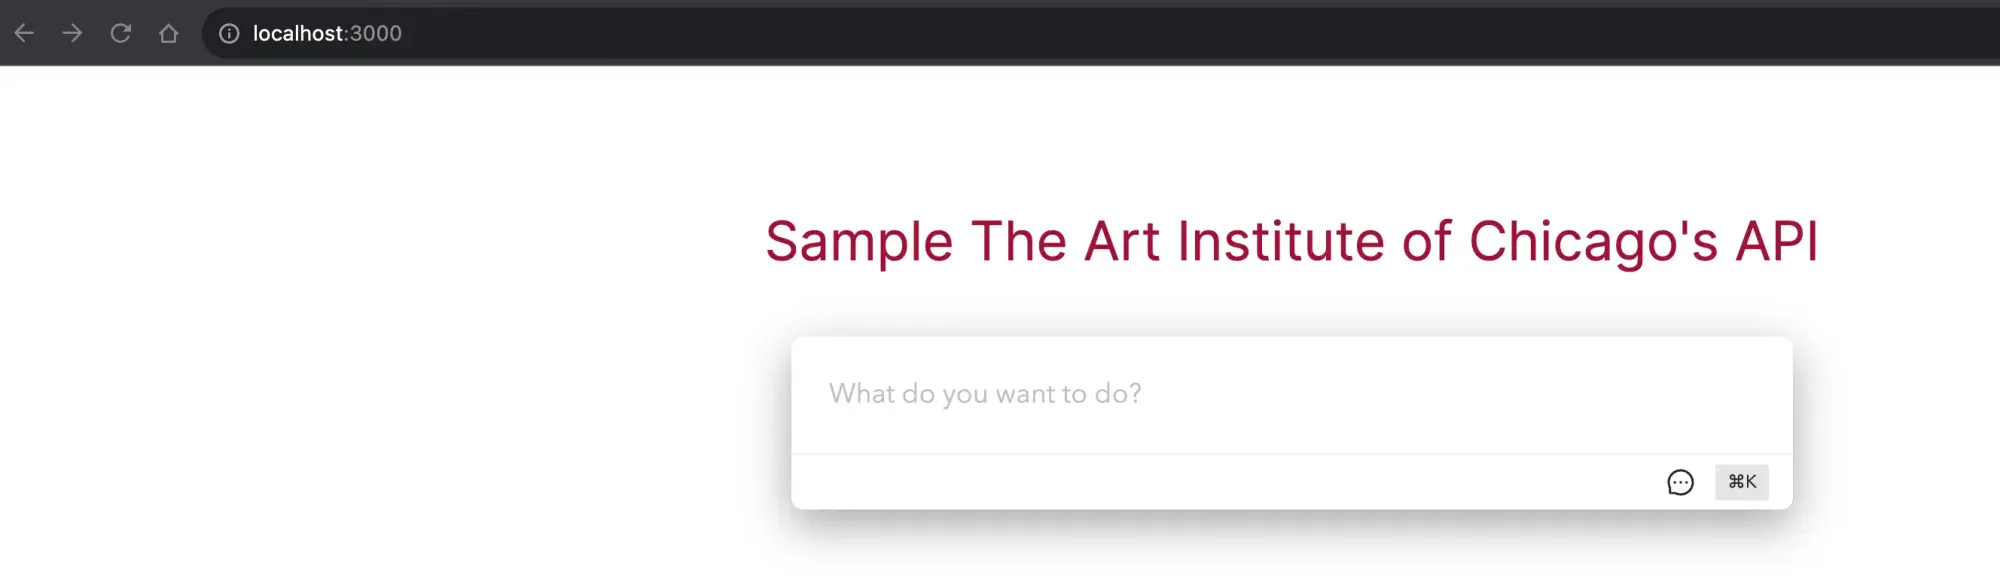
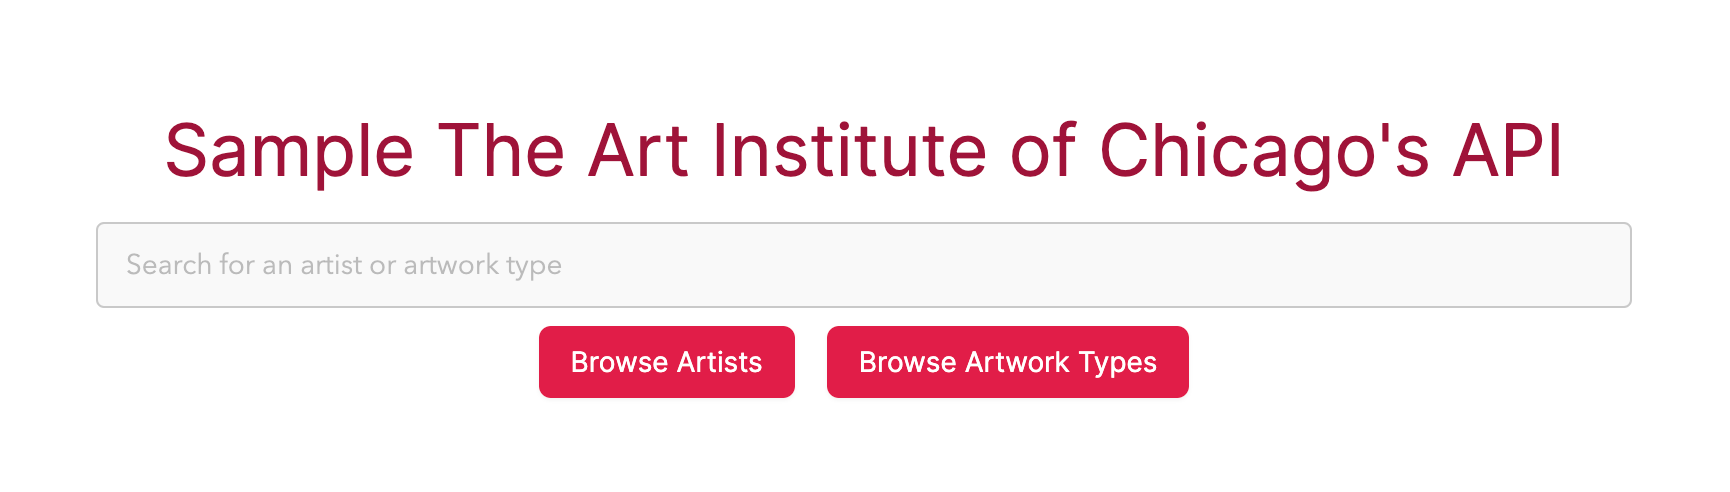
The example project is a Next.js application that fetches data from the Art Institute of Chicago API.
The app lets the user browse artists and artwork types available from the API. Users can browse artists and view twelve artworks annotated with the artist name. Clicking on an artwork provides details such as the title, artist, and artwork type. The "Browse Artwork Types" option shows the available artwork types, and users can select a type to see sample artworks. Clicking on an artwork in the sample displays its details as described above.
Desired additional functionality
We want to add the following functionality:
- allow user to search for a particular artist and navigate to a page of that artist’s works
- allow user to search for a particular artwork type and navigate to a page of works of that type
- feature a number of “still life” artworks
- allow user to enable distraction-free mode where all text and navigation is hidden and only the image of the artwork is visible
Overall we want to make it easier for our user to find artwork they are interested in and enjoy the artwork according to their preference.
CommandBar to the rescue!
By leveraging CommandBar's Universal Search product, we have the ability to add a wide range of functionality to our project, all while maintaining an attractive and user-friendly UI/UX. With minimal code required, CommandBar empowers us to enhance our application's search capabilities and provide a seamless search experience for our users.
Adding CommandBar to the project
Following the CommandBar Docs, we will install CommandBar and add it to our application.
⚡ CommandBar has “Tips & Tricks” articles for several frontend frameworks including the framework we are using, Next.js!
To add the CommandBar SDK to our project, run npm install commandbar --save (or yarn add commandbar --dev) in the terminal.
Next, we’ll create a client component to initialize and boot the CommandBar. For more information on booting and shutting down the CommandBar SDK, see the Lifecycle documentation.
// File: /components/CommandBar/index.tsx

"use client";
import { useEffect } from "react";
import { init } from "commandbar";

if (typeof window !== "undefined") {
  init("MY_ORG_ID");
}

export default () => {
  useEffect(() => {
		// Here we are passing in an empty string as the userId and no userAttributes param.
		// In a real application you would want to include these so you can tag
		// analytics events and for end-user personalization.
    window.CommandBar.boot("");

    return () => {
      window.CommandBar.shutdown();
    };
  }, []);

  return null;
};
We’ll include our CommandBar component into our RootLayout component (/app/layout.tsx).
// File: /app/layout.tsx
import CommandBar from "@/components/CommandBar";

// ! Some NextJS boilerplate code removed to minimize surrounding code for ease of reading

export default function RootLayout({
  children,
}: {
  children: React.ReactNode;
}) {
  return (
    <html lang="en">
      <body>
        <main className="flex min-h-screen flex-col items-center  p-24 gap-4">
          <Link href="/" className="text-4xl text-rose-800">
            Sample The Art Institute of Chicago's API
          </Link>

          {children}
        </main>
      </body>
      <CommandBar /> // 👈
    </html>
  );
}
Now we can type ⌘K and open the CommandBar!
Adding Artist search
We can search for artists in the AIC API at this endpoint: https://api.artic.edu/api/v1/artists/search. We want to take the user’s search string, pass it to the API /artists/search endpoint, and use the data returned by the API as results in the CommandBar search. The data provided to CommandBar are referred to as records. According to the CommandBar documentation, “Records can be loaded either when the page is loaded, when the bar is opened, or as the user types.” We want records loaded according to the input the user types.
In our CommandBar component file we will add a function for searching for artists (onSearchArtists). Then we will make this function available to CommandBar by calling window.CommandBar.addRecords passing in a key for the records (”artists” in this case), an initial value (an empty array), and options object. This object will include our custom search function as the onInputChange option and “title” as our labelKey option. This is the key we want to use to display the object’s label. For more information about available options and loading records, refer to the SDK documentation on Records.
const onSearchArtists = (query: string) => {
  /* ... */
};

window.CommandBar.addRecords("artists", [], {
  onInputChange: onSearchArtists,
  labelKey: "title",
});
Once we have our records we will want to be able to navigate to a page in our application for the result using our Next.js router. In order to this we need to add the router to CommandBar. In our useEffect callback function we will call window.CommandBar.addRouter, passing it our router’s push function.
const router = useRouter(); // called outside and before the useEffect function in our CommandBar component

window.CommandBar.addRouter(router.push);
Our CommandBar component now looks like this:
// File: /components/CommandBar/index.tsx

"use client";
import { useEffect } from "react";
import { init } from "commandbar";
import { useRouter } from "next/navigation";

if (typeof window !== "undefined") {
  init("MY_ORG_ID");
}

const onSearchArtists = async (query: string) => {
  let elasticSearchQuery: any = {
    query: {
      match: {
        title: query,
      },
    },
  };

  const baseUrl = "<https://api.artic.edu/api/v1/artists/search?">;
  const formattedQuery = encodeURIComponent(JSON.stringify(elasticSearchQuery));
  const urlToFetch = `${baseUrl}params=${formattedQuery}&limit=12&fields=title,id,birth_date,description`;

  const res = await fetch(urlToFetch);

  const resJson = await res.json();

  return resJson.data;
};

export default () => {
	const router = useRouter();

  useEffect(() => {
    window.CommandBar.boot("");

		window.CommandBar.addRouter(router.push);

		window.CommandBar.addRecords("artists", [], {
      onInputChange: onSearchArtists,
      labelKey: "title",
    });

    return () => {
      window.CommandBar.shutdown();
    };
  }, []);

  return null;
};
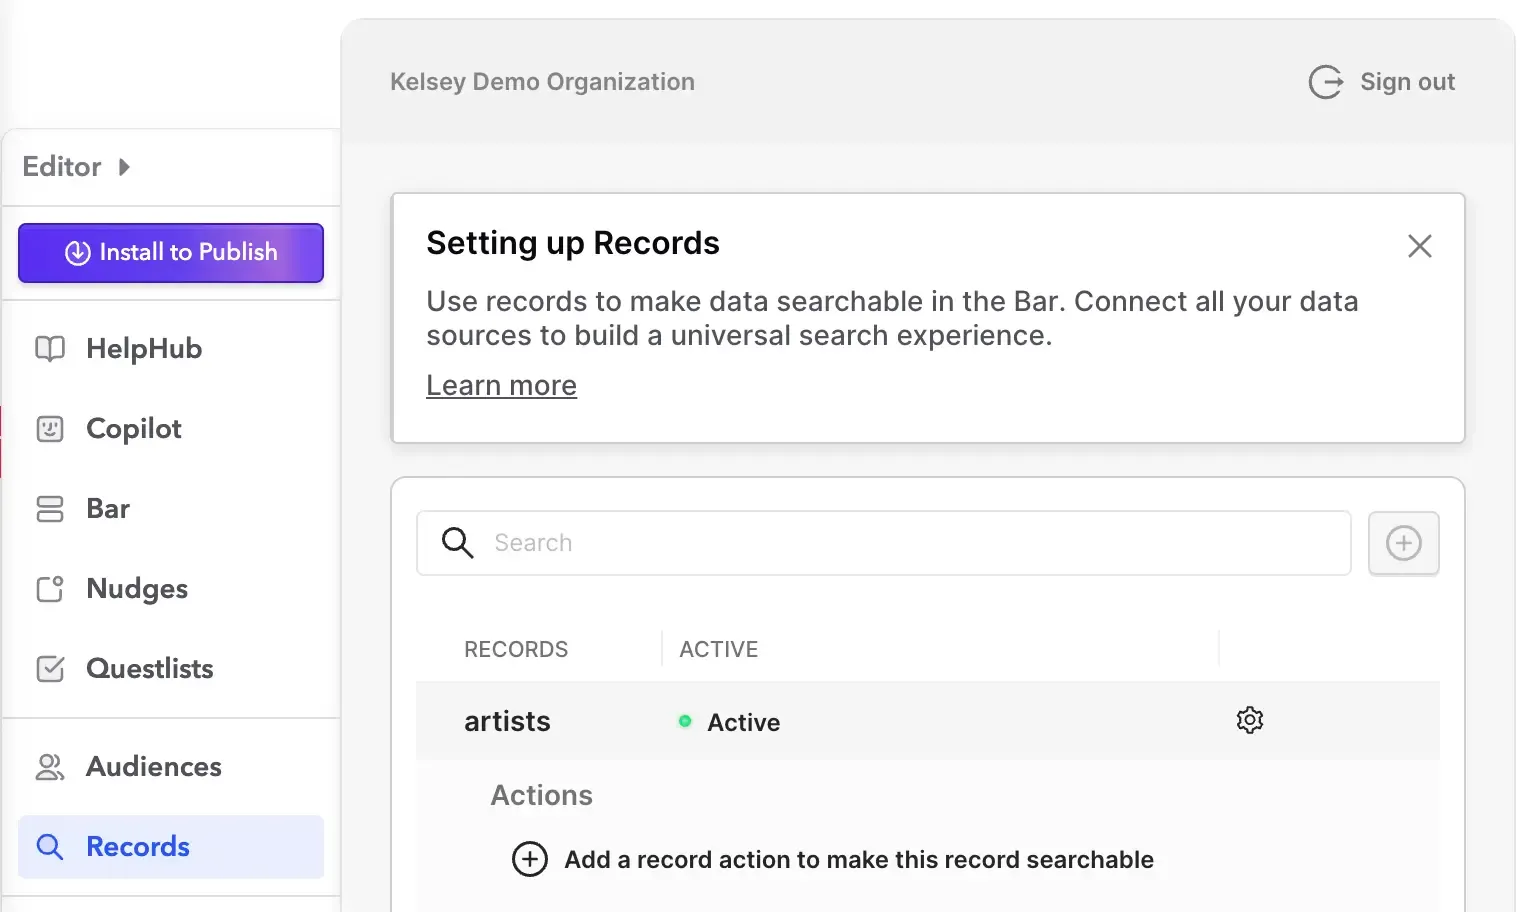
In order to route correctly we need to return to the CommandBar Studio and add an action for our record. Inside the editor we will navigate to “Records” and click “Add a record action to make this record searchable” under our “artists” record.
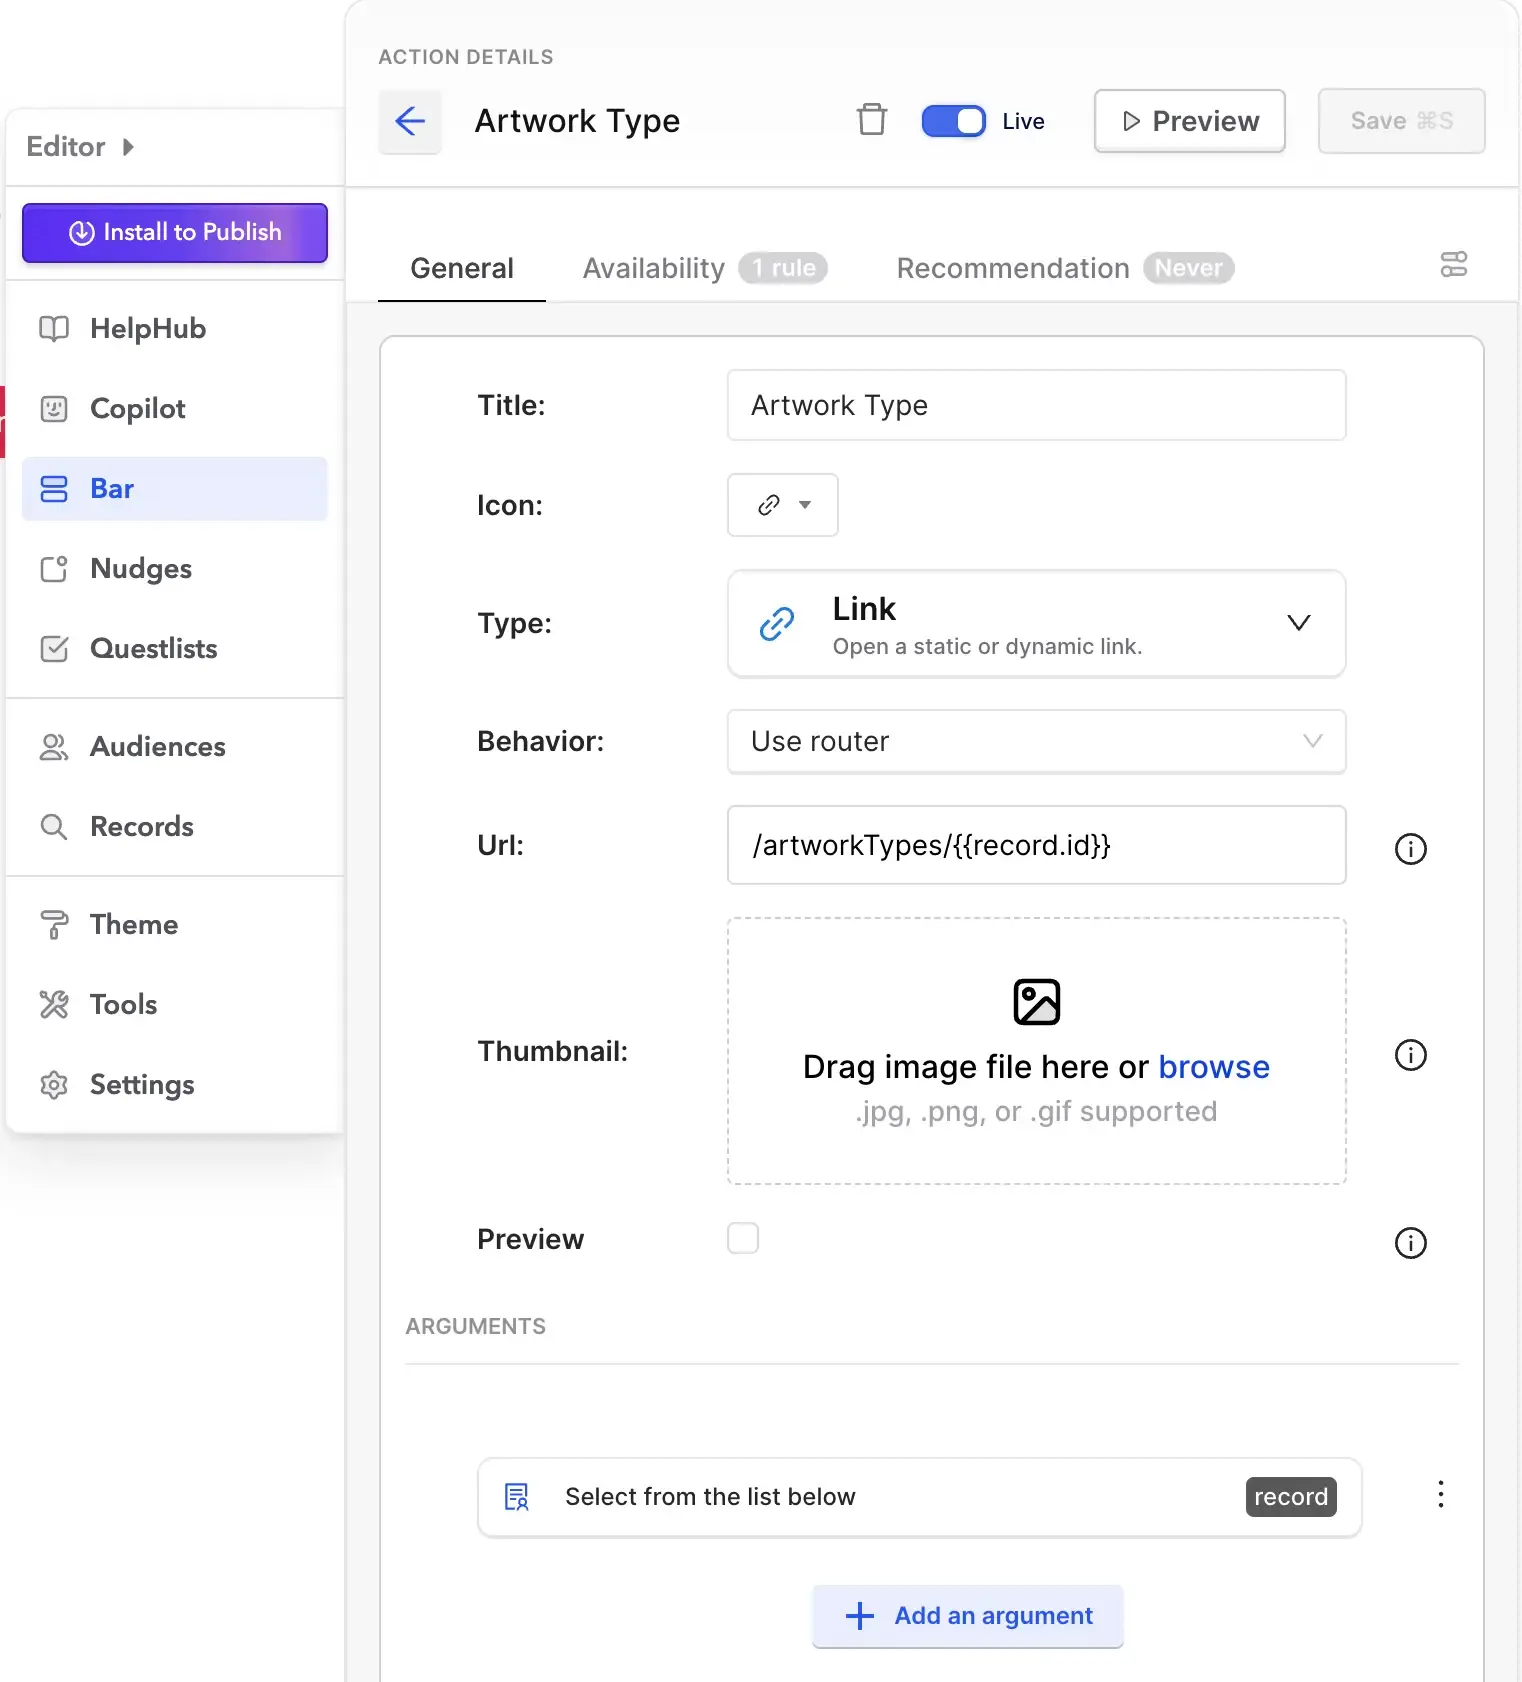
In these screen capture you can see I am using the CommandBar Chrome extension to edit my CommandBar alongside my application. This is helpful because this editor is aware of the records we have registered using addRecords in the previous steps.We will give our action a Title and select “Link” as the Type. The Behavior will be “Use router” and we will provide the Url the router will use to navigate to this particular artist. The “id” field is one of the fields available on the artist records our search function will return. It is available to us here as well as all the other record fields. We can use the fields by using interpolation signified by curly braces.
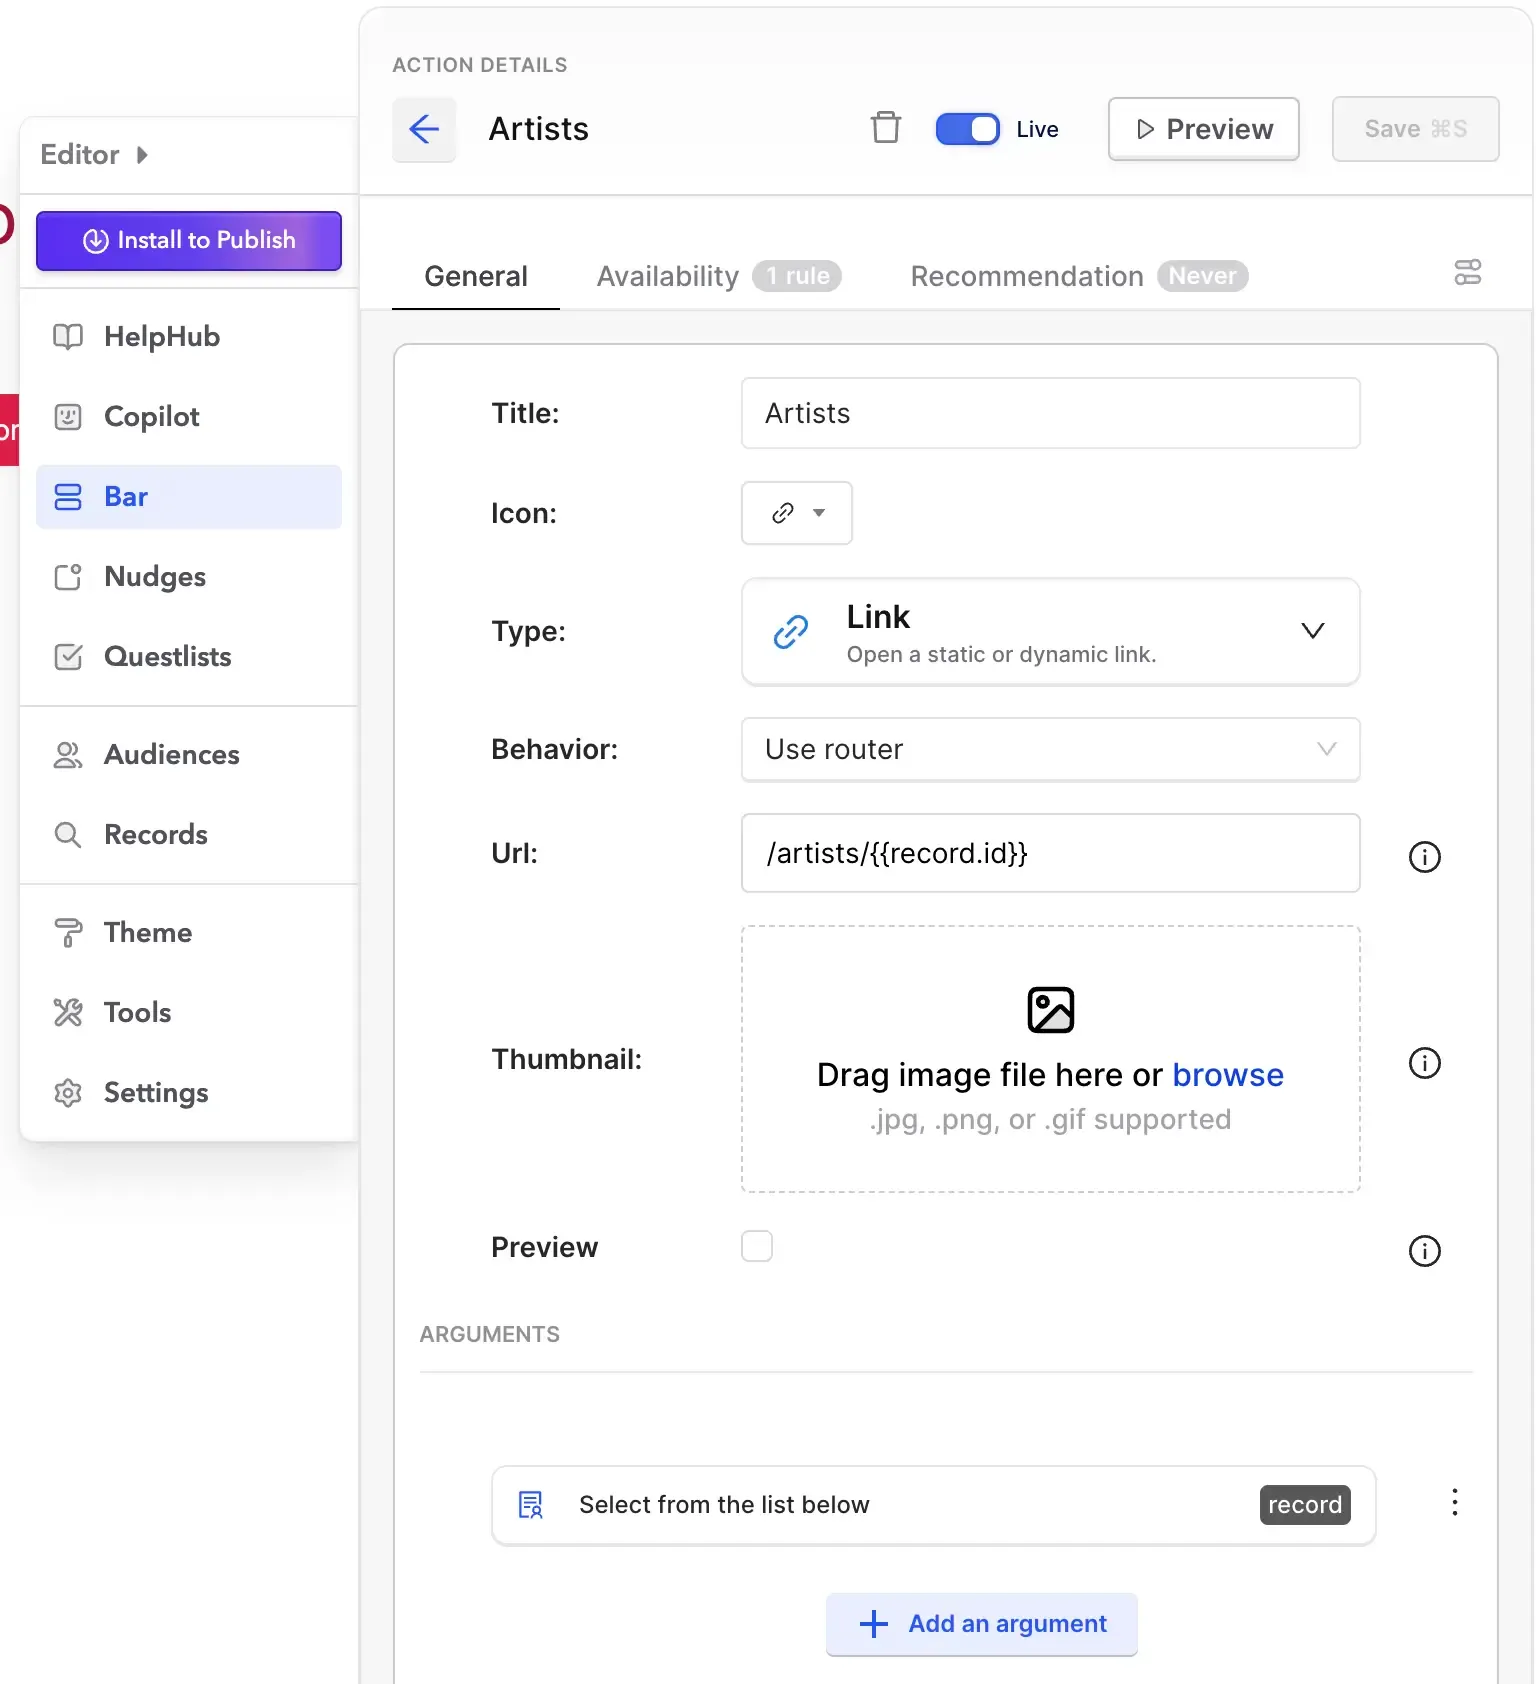
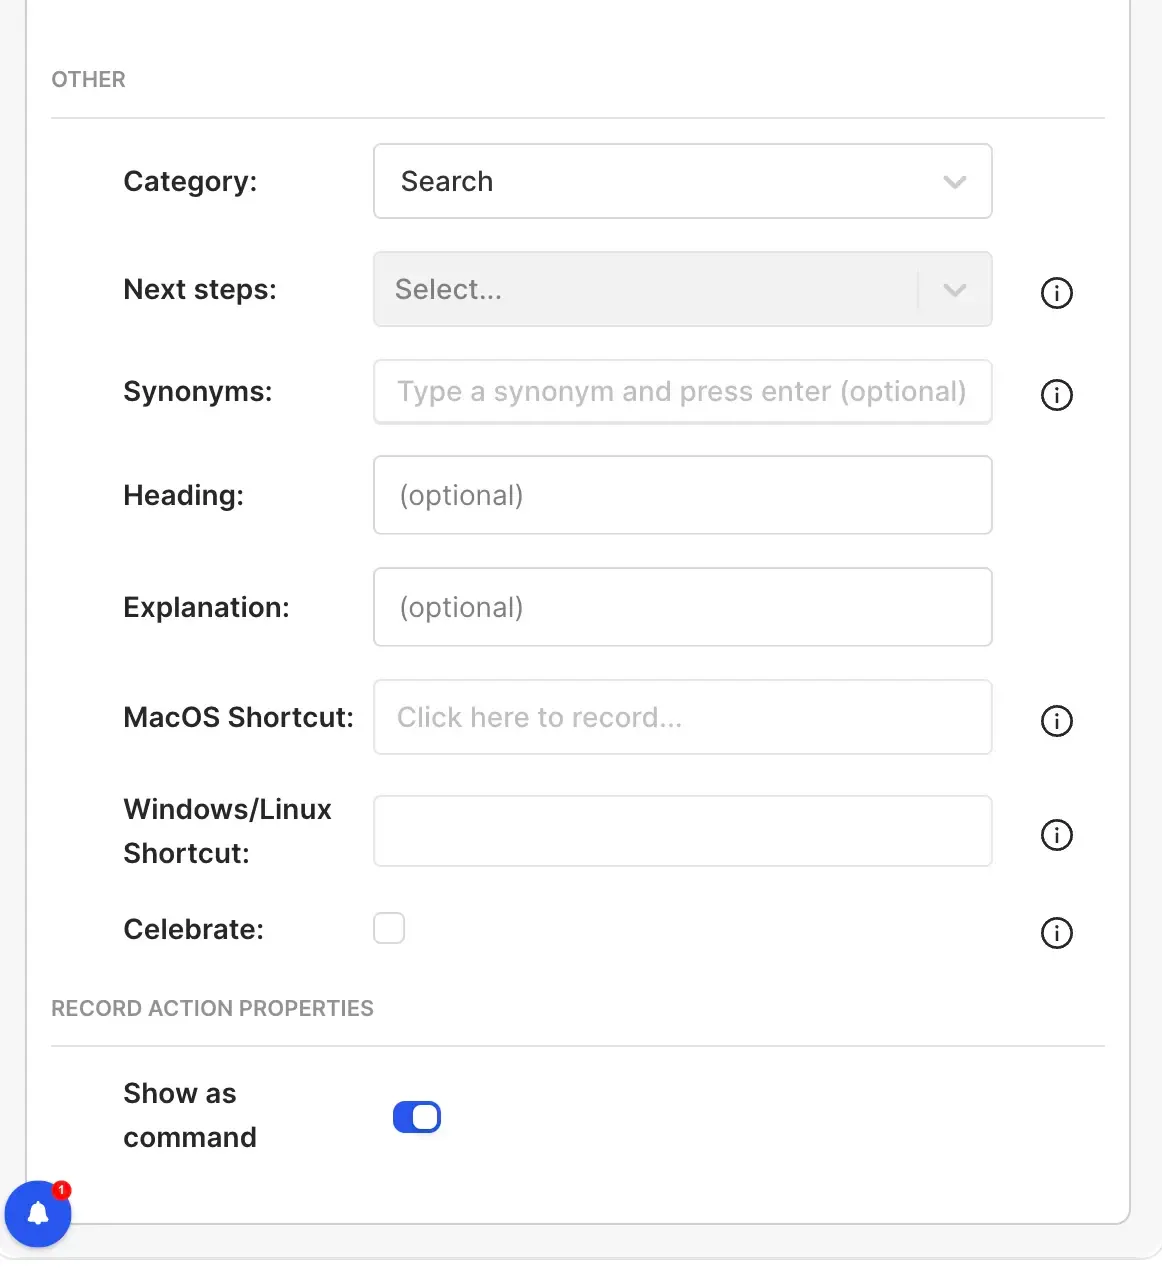
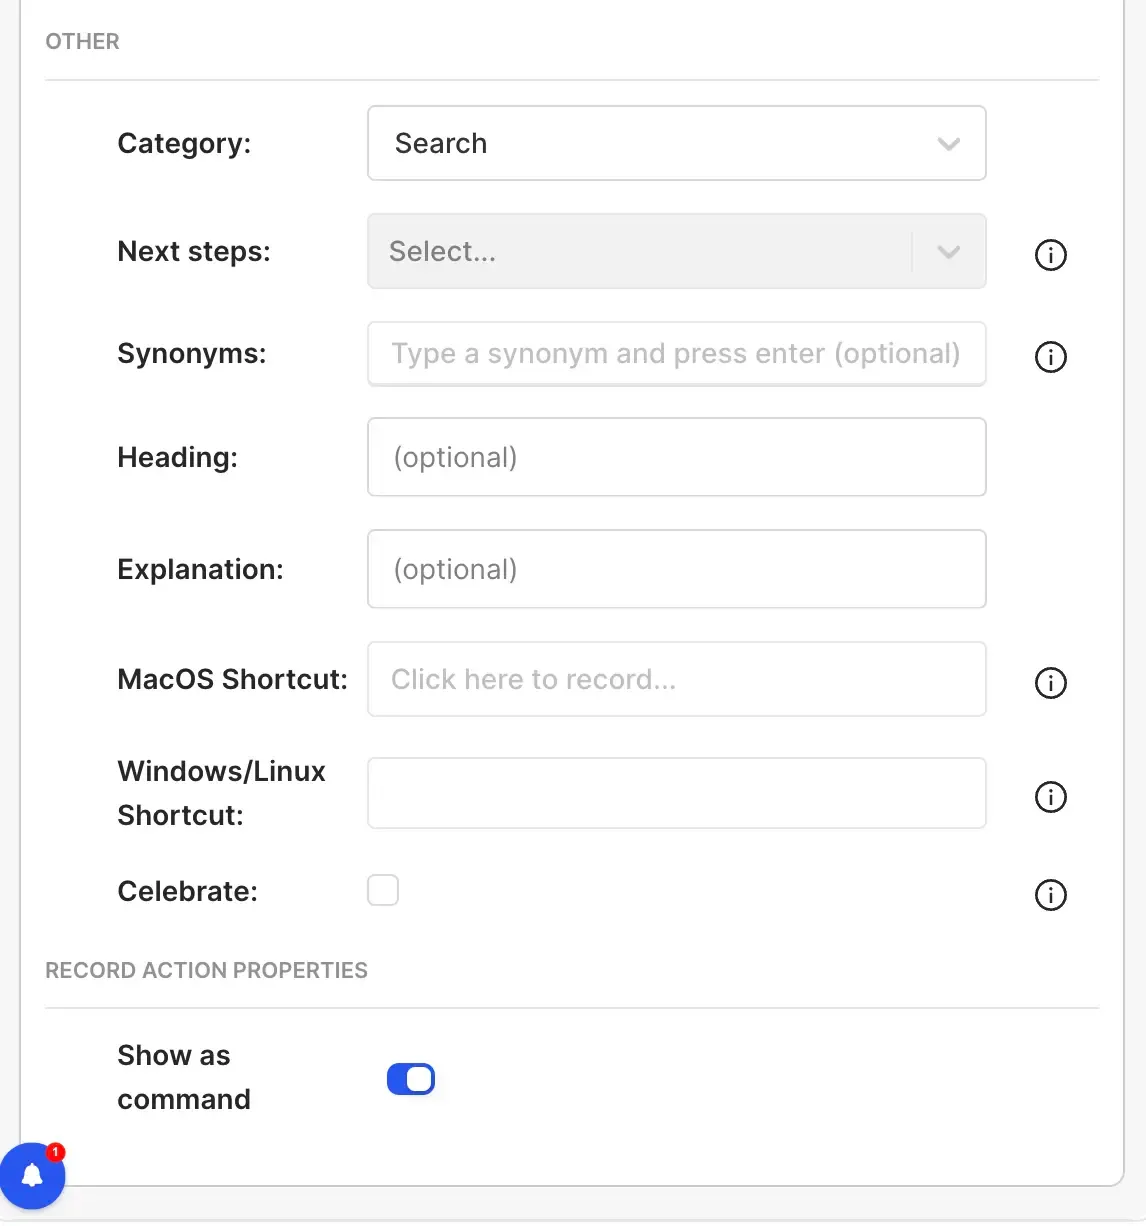
In the Other section we will select the Category we want our results to appear under and we’ll toggle on Show as command. Then we will Save and make sure the Live toggle is in the “ON” state.
To learn more about record actions and available options, refer to the CommandBar docs about defining record actions.
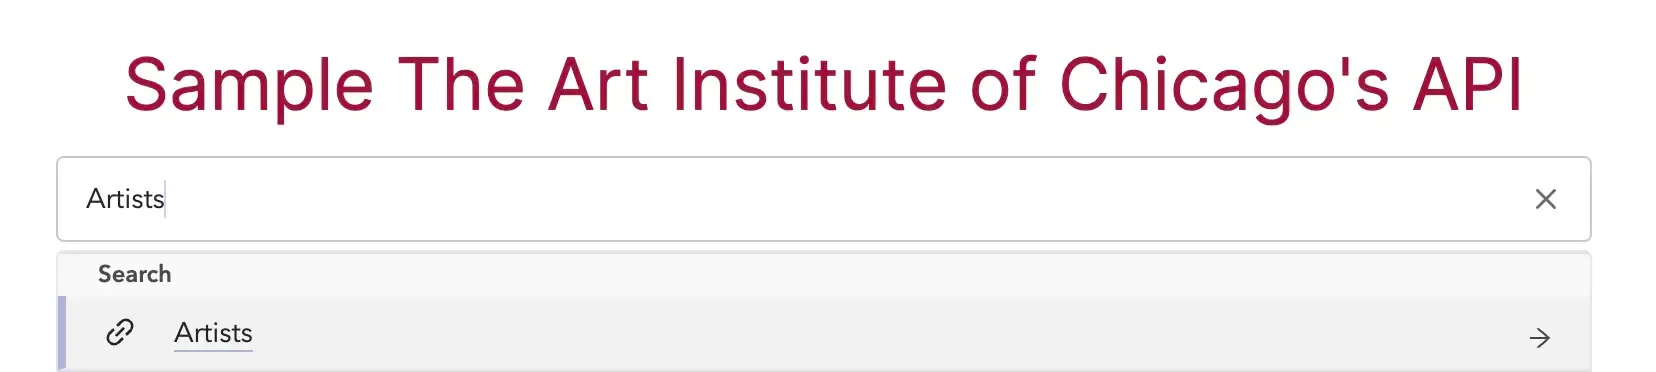
When we open the CommandBar, the "Artists" command is visible in the selected category ("Search"). We can search for an artist by typing their name or by selecting the "Artists" command and then typing the artist's name. Clicking on a search result will take us to the artist’s page.
We can customize how our records appear in the search results by passing the __extraHTML option to window.commandBar.addRecords.
We can customize how our records appear in the search results by passing the __extraHTML option to window.commandBar.addRecords.
const truncateString = (str: string, length: number) => {
  return str.length > length ? str.substring(0, length) + "..." : str;
};

// our helper function returns HTML markup including details about our record as a string
const getExtraHtml = (description: string, chipText: string) =>
  `<div style="display: grid; grid-template-columns: auto auto; gap: 1rem; font-size: 13px; align-items: center; padding-bottom: 0.5rem;">
  <div>${truncateString(description, 64)}</div>
  <div style="
  border-radius: 4px;
  padding-left: 8px;
  padding-right: 8px;
  font-size: 10px;
  border: 1px solid rgb(189, 189, 189);
  ">${chipText}</div>
  </div>
  `;

const onSearchArtists = async (query: string) => {
  let elasticSearchQuery: any = {
    query: {
      match: {
        title: query,
      },
    },
  };

  const baseUrl = "<https://api.artic.edu/api/v1/artists/search?">;
  const formattedQuery = encodeURIComponent(JSON.stringify(elasticSearchQuery));
  const urlToFetch = `${baseUrl}params=${formattedQuery}&limit=12&fields=title,id,birth_date,description`;

  const res = await fetch(urlToFetch);

  const resJson: ArtistResponse = await res.json();

  return resJson.data.map((artist) => ({
    ...artist,
    __extraHTML: getExtraHtml(
      artist.description || artist.title,
      artist.birth_date.toString()
    ),
  }));
};
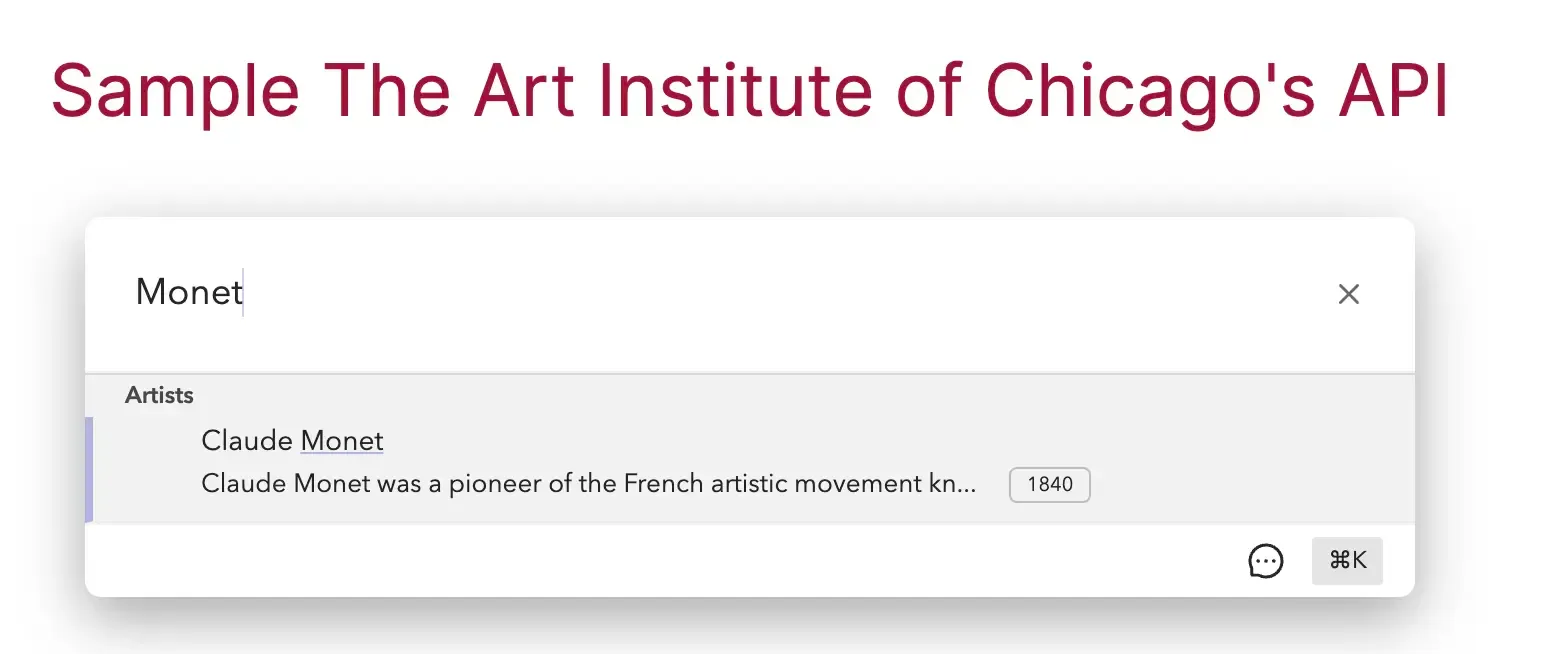
Now our search result includes a description of the artist and the artist’s birth year.
This is great but we also want to be able to search for artwork types. We’ll do that next.
Adding Artwork Types search
We can fetch artwork types from the AIC API but the API does not have a /search endpoint for artwork types. For artwork types we will get all types (totaling 44 when writing this blog post) and use the user’s input to sort the best matches to the top in the client. We will fetch the artwork types from https://api.artic.edu/api/v1/artwork-types?query[term][is_public_domain]=true&fields=title,id&limit=100 inside a function called onSearchArtworkTypes.
// API does not have search endpoint for artwork types so we query all and then sort
const onSearchArtworkTypes = async (query: string) => {
  const res = await fetch(
    `https://api.artic.edu/api/v1/artwork-types?query[term][is_public_domain]=true&fields=title,id&limit=100`
  );

  const resJson: Response = await res.json();

  return sortObjectsByBestMatch(resJson.data, "title", query);
};
The sortObjectsByBestMatch is a client-side function that uses lodash to sort the artwork types by their “title” property.
import { deburr, lowerCase, sortBy } from "lodash";

const sortObjectsByBestMatch = <T extends Record<any, any>>(
  objs: T[],
  key: keyof T,
  query: string
) => {
  const normalizedQuery = deburr(lowerCase(query));
  return sortBy(objs, (obj) => {
    const normalizedString = deburr(lowerCase(obj[key]));
    const index = normalizedString.indexOf(normalizedQuery);
    return index === -1 ? Infinity : index;
  });
};

export default sortObjectsByBestMatch;
In the same way we added the artists records, we’ll call window.CommandBar.addRecords to make artwork types searchable by CommandBar. We’ll also add an “Artwork Type” action in the CommandBar Studio. It will be the same as our “Artist” action but will have a different Title (”Artwork Type”) and a different Url (”/artworkTypes/{{record.id}}”).
window.CommandBar.addRecords("artworkTypes", [], {
  onInputChange: onSearchArtworkTypes,
  labelKey: "title",
});
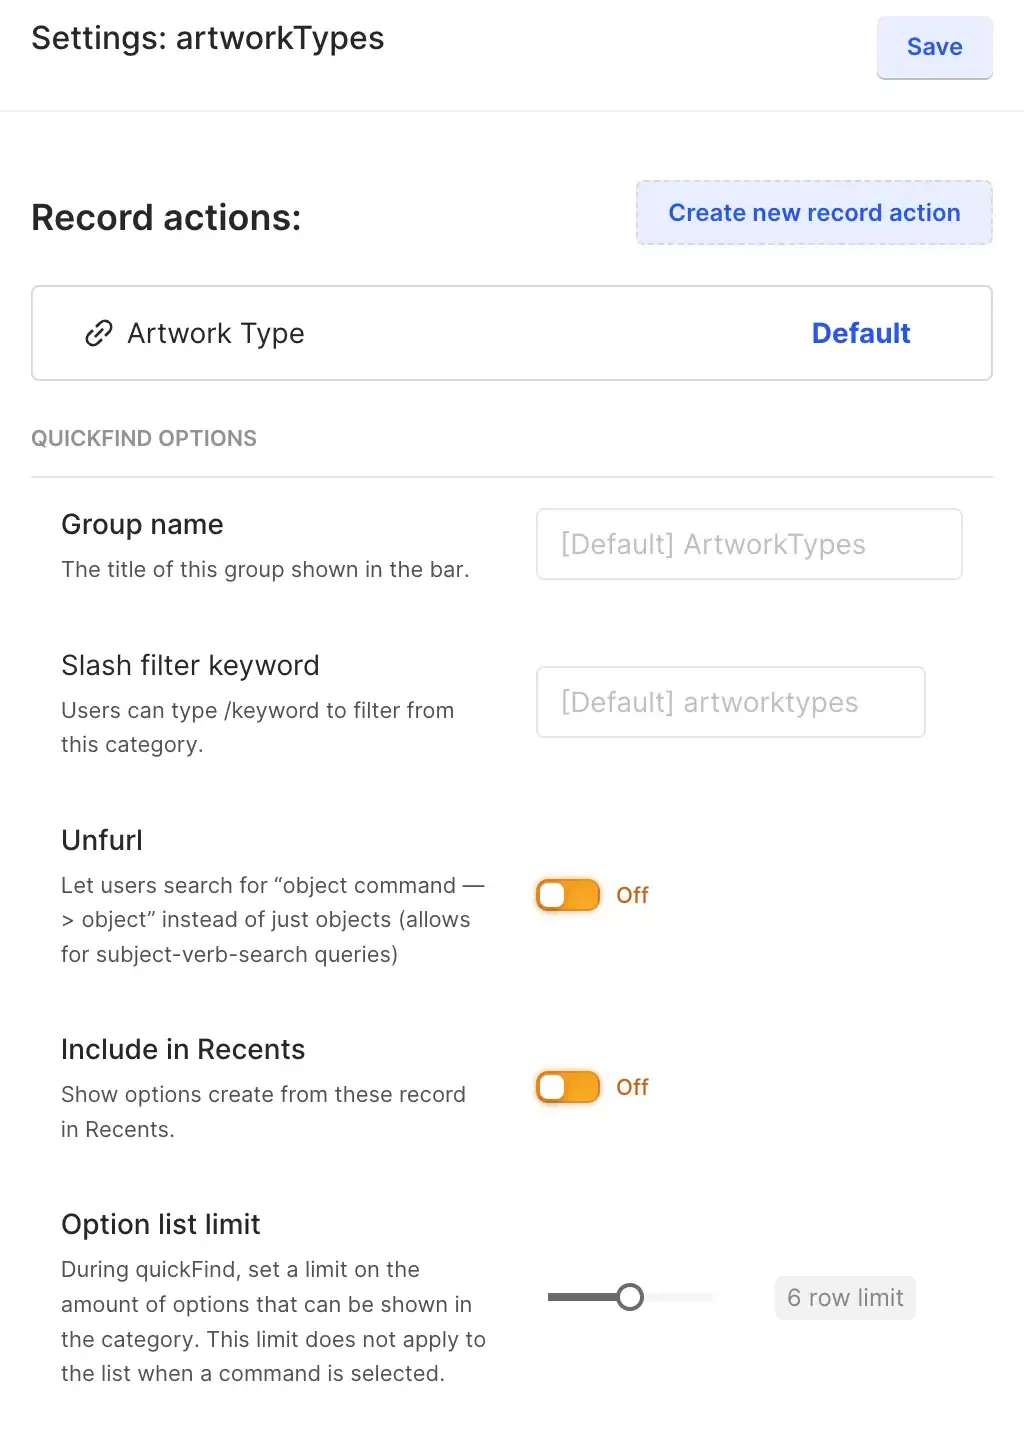
We also want to limit the results in the CommandBar to a manageable number. We can do this by clicking the artworkTypes record’s gear icon and setting the Option list limit to “6”.

Now our CommandBar includes the “Artwork Type” action under the “Search” category alongside the “Artists” action.
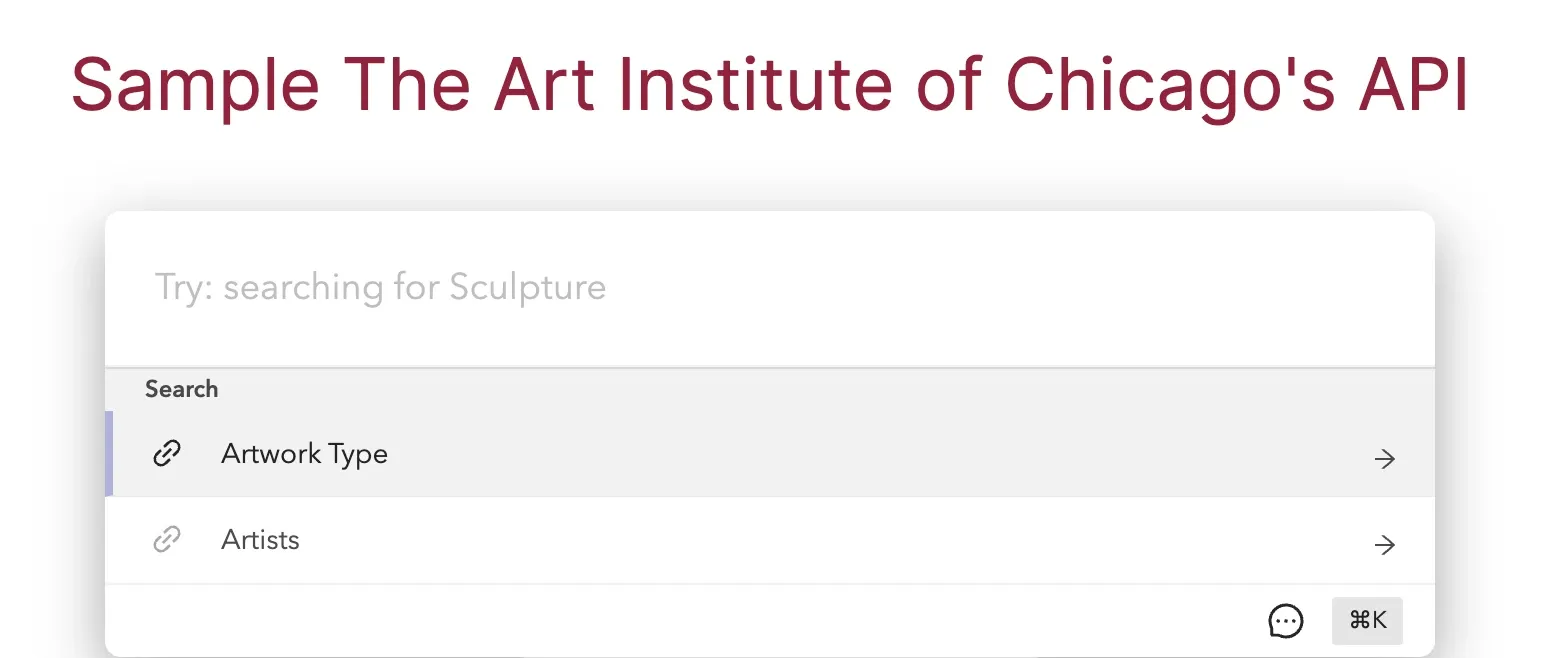
When we select a result in the CommandBar we are navigated to the page for that artwork type.

Next we want to feature a pre-determined set of artworks and prompt the user to view them when they open the CommandBar.
Adding Featured Artworks
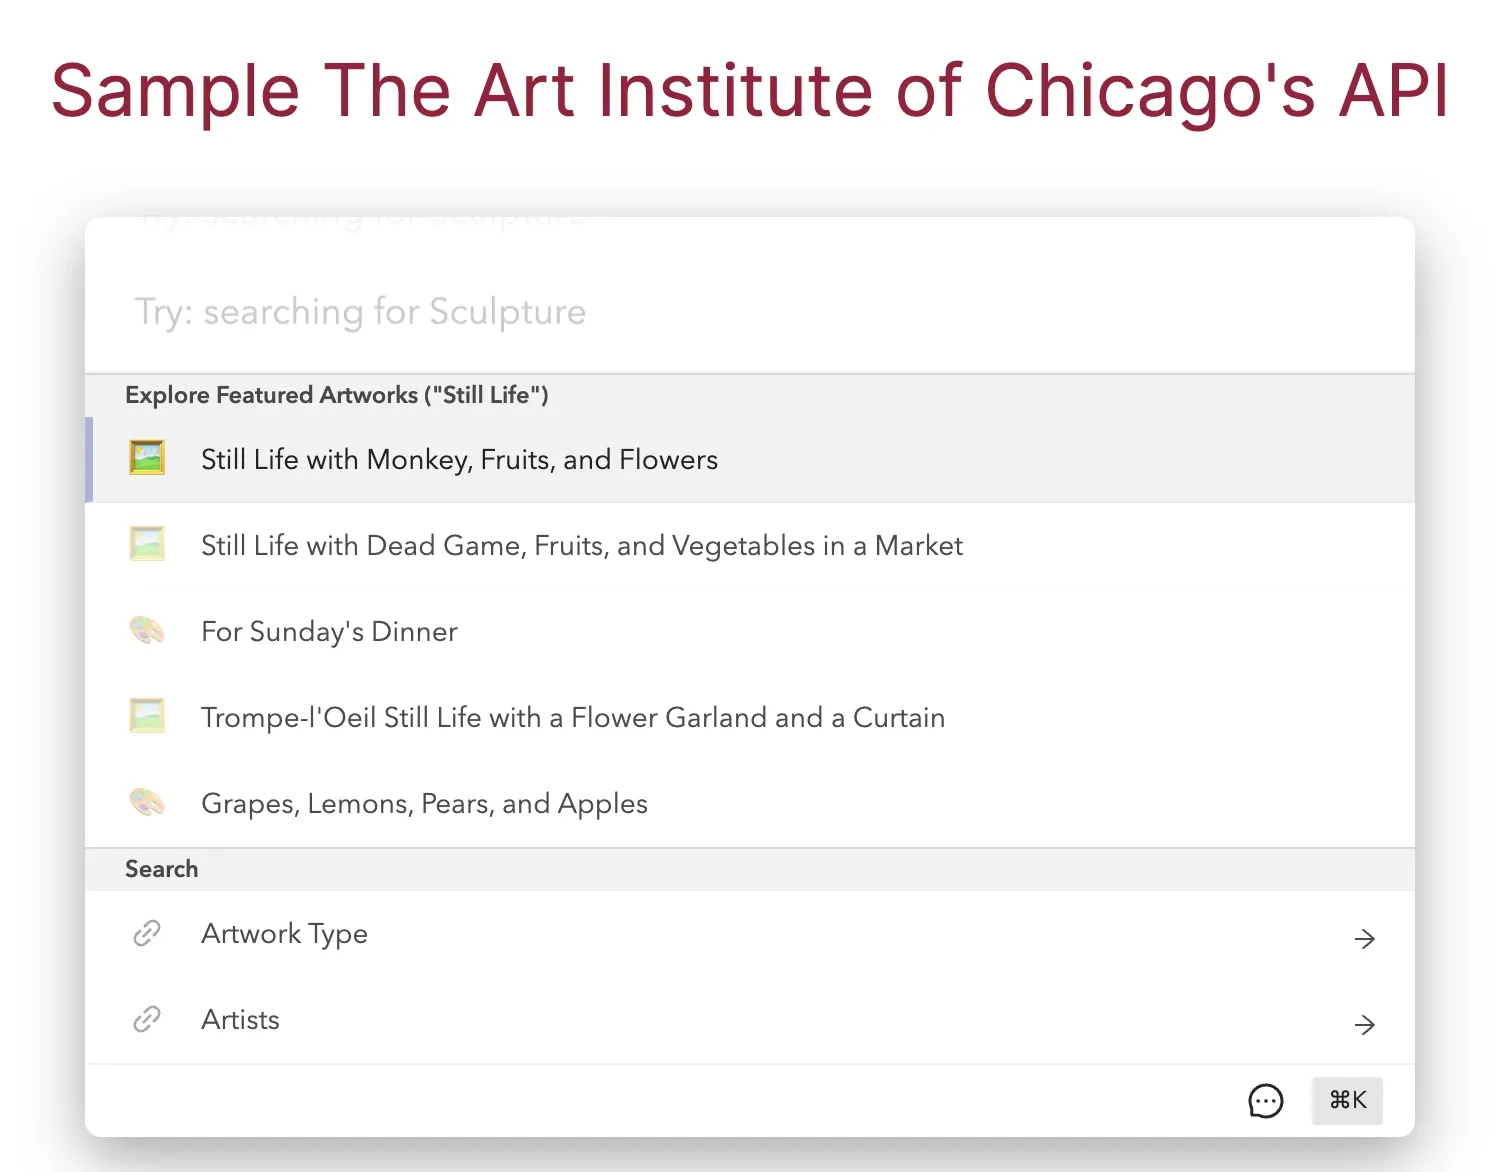
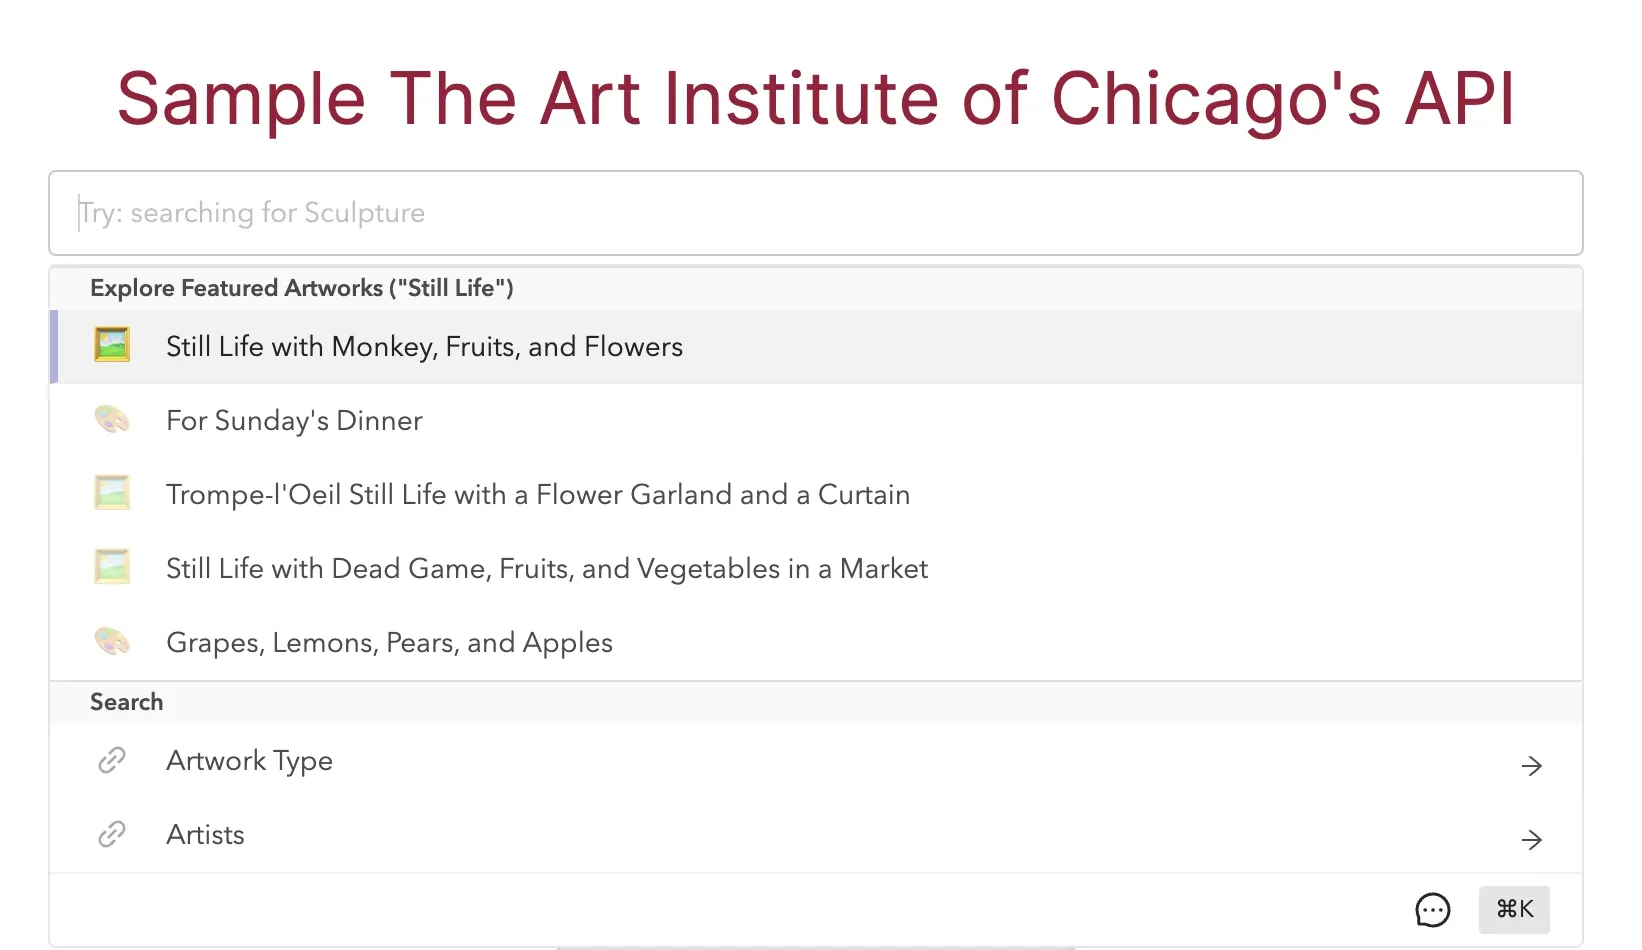
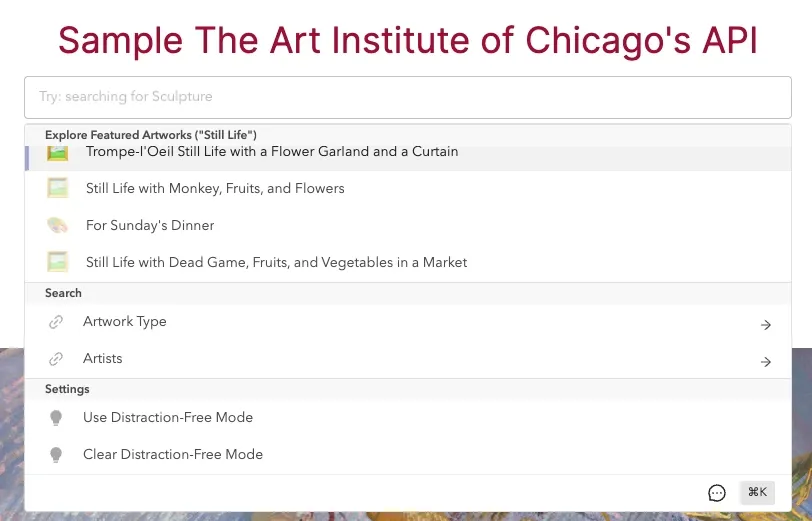
For this next feature I’ll start by showing you what final product we want so we can better examine why using records wouldn’t work for this use case. When the user opens the CommandBar, we want them to see five artworks listed under an “Explore Featured Artworks” category.
Using records (like we did above) we could implement this approximately but the user would have to click through an action before seeing the artworks themselves. This alternative is pictured below.
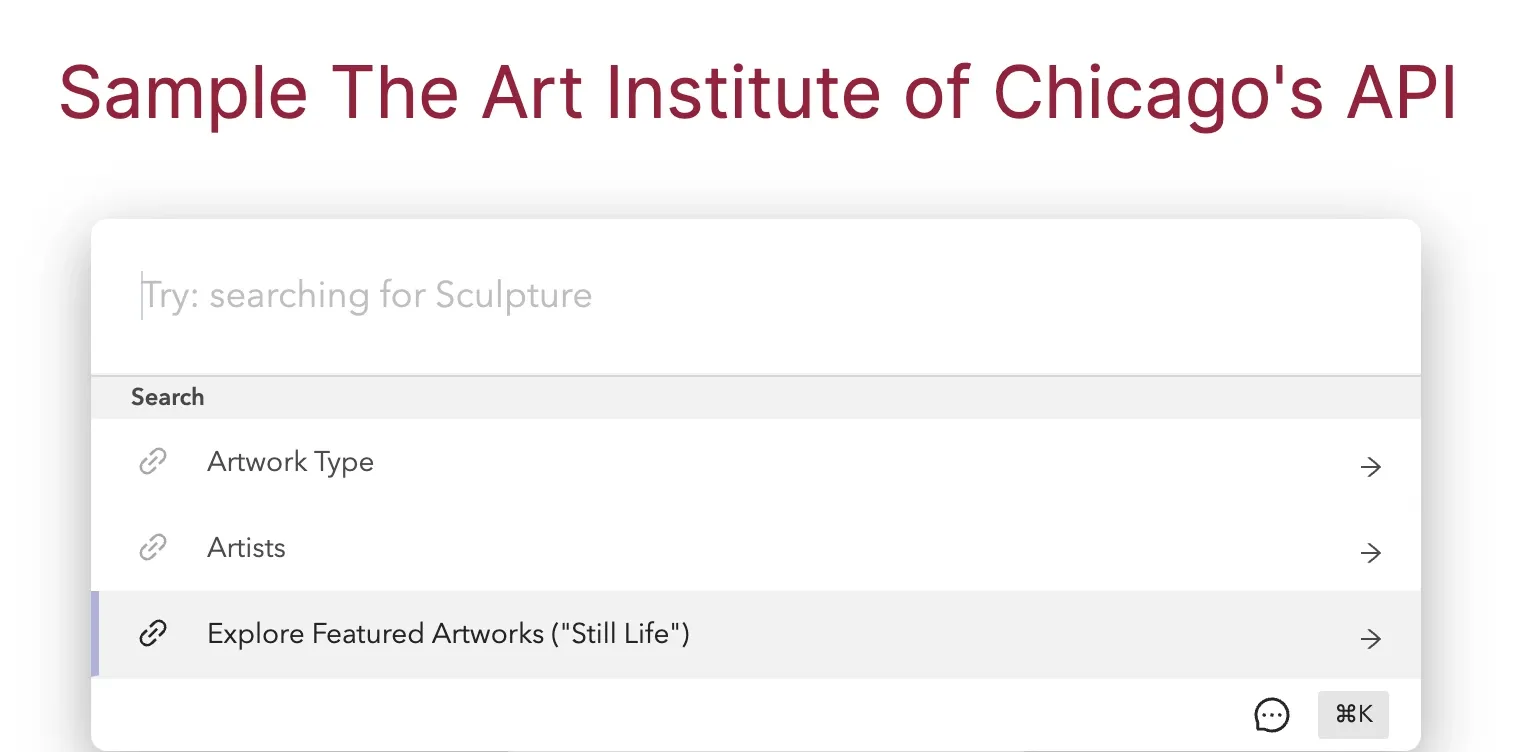
This is okay but it’s not exactly what we want.
Instead of using addRecords we can use addCommand to include a command for each artwork we want to feature. We will start by creating a function to fetch the artworks we want to feature.
const getFeaturedArtworks = async () => {
	// we are fetching five artworks in the public domain using a search string of "still life"
  const response = await fetch(
    `https://api.artic.edu/api/v1/artworks/search?query[term][is_public_domain]=true&limit=5&fields=id,title,material_titles,is_public_domain&q=still%20life`
  );
  const resJson = await response.json();

  return resJson.data as {
    id: number;
    title: string;
    material_titles: string[];
  }[];
};
We will call the function in the useEffect callback function of the CommandBar component. We will iterate over each artwork and call window.CommandBar.addCommand to add a command for each artwork. We will pass the following options:
- text: the label shown to the user in the CommandBar
- name: a unique identifier for the command
- icon: an icon to show alongside the label
- template: the schema defining command action (what happens when executed)
- category: the id (or name) of the category to which this command belongs
For more information about available options, refer to the SDK documentation on Commands.
getFeaturedArtworks().then((records) => {
      records.forEach((record) => {
        const icon = getIcon(record.material_titles);
        window.CommandBar.addCommand({
          text: record.title,
          name: `featured_artwork_${record.id}`,
          icon,
          template: {
            type: "link",
            value: `/${record.id}`,
            operation: "self",
          },
          category: 14786,
        });
      });
    });
The template schema indicates we want the command to behave as a link, navigating our user to the record’s id (e.g. “localhost:3000/1234”).
The ID passed to the category option comes from the CommandBar Studio. In the editor, add the “Explore Featured Artworks” category and click the triple-dot menu and “Copy id” to get this value.

In our example app we are using emojis as icons. I created a simple function that looks at the materials of the artwork and selects an emoji accordingly.
const getIcon = (material_titles: string[]) => {
  const materials = material_titles.join("");
  if (materials.includes("paint")) {
    return "🎨";
  }

  if (materials.includes("sculpture")) {
    return "⛏️";
  }

  if (materials.includes("drawing")) {
    return "✏️";
  }

  if (materials.includes("print")) {
    return "🖨️";
  }

  if (materials.includes("photo")) {
    return "📷";
  }

  if (materials.includes("paper")) {
    return "📄";
  }

  return "🖼️";
};
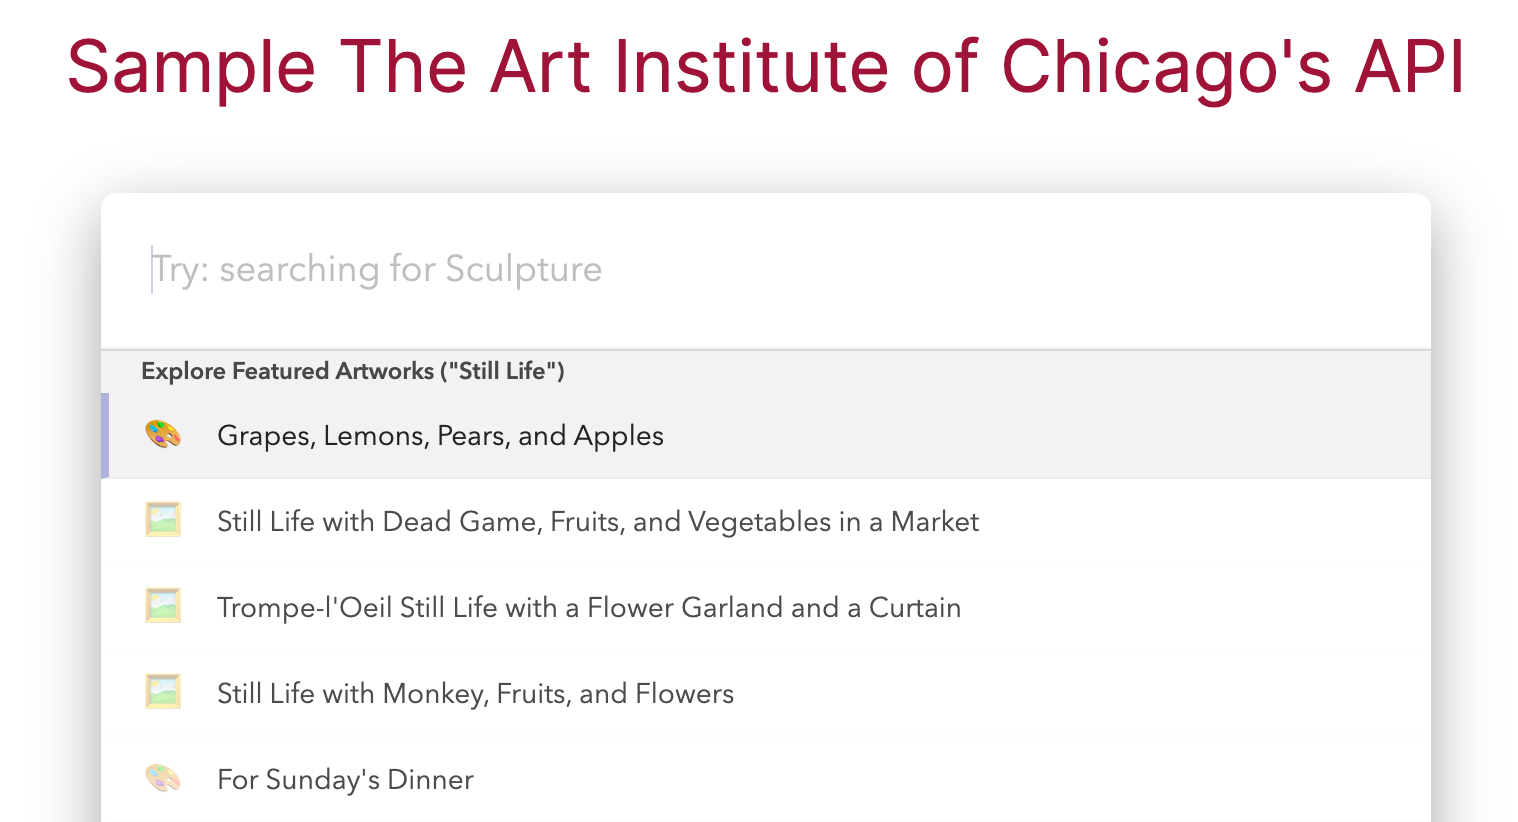
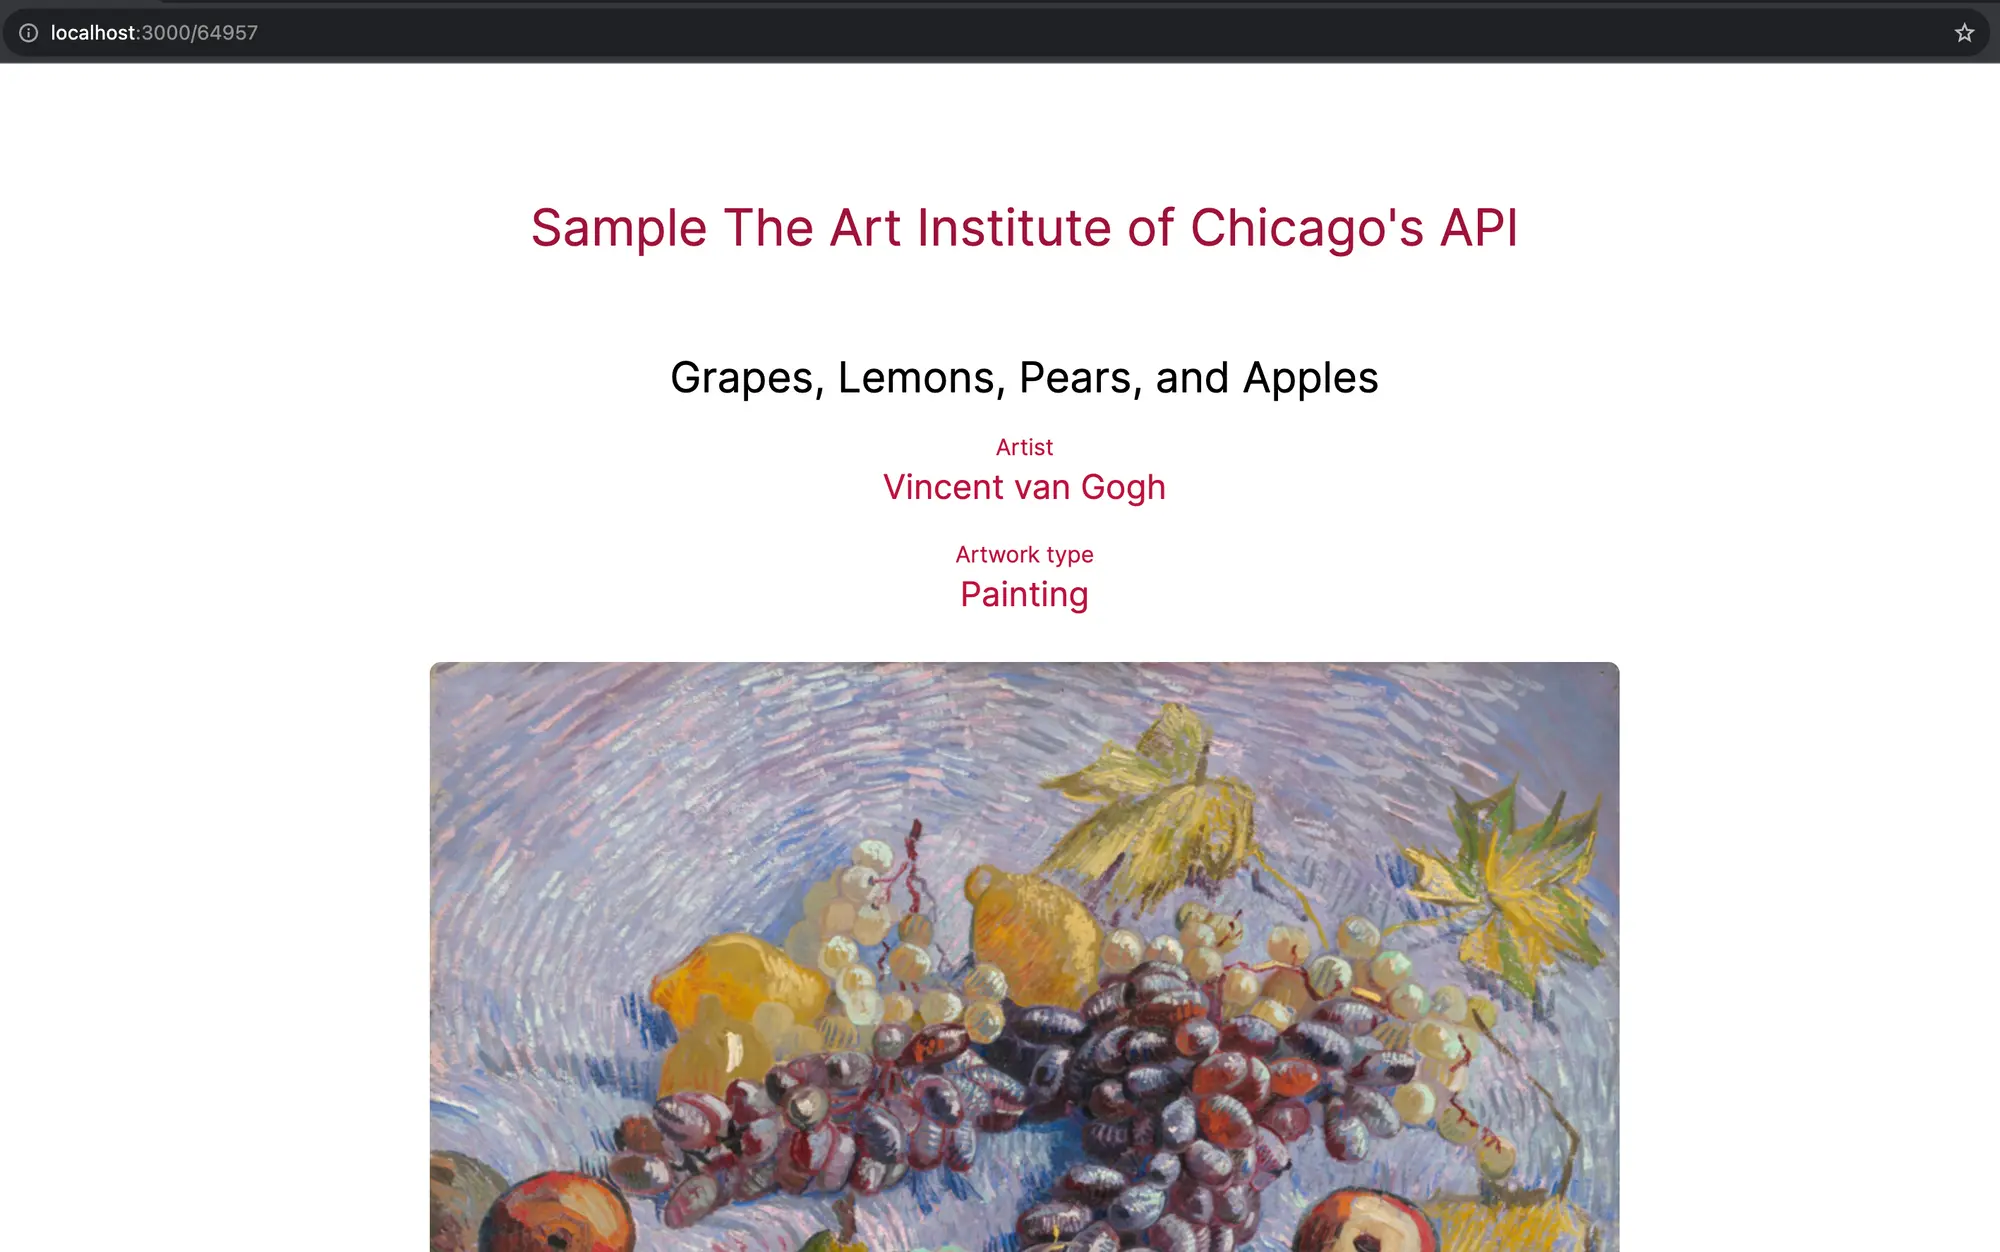
Now our CommandBar includes our featured artworks with custom emoji icons. When we click on one of the results we are navigated to the page for the artwork.
Let’s take a moment now to add our CommandBar to the page so users will see it as soon as they open our application.
Adding CommandBar inline
We’ll start by adding a SearchBar component. It will be a div that will indicate where we want the inline CommandBar to be added. We will give it an id attribute of “commandbar-inline-root”.
// File: /components/SearchBar.tsx
"use client";

export default () => {
  return <div className="w-full md:w-1/2 mb-9" id="commandbar-inline-root" />;
};
Next we’ll add the component to our RootLayout.
// File: /app/layout.tsx
import CommandBar from "@/components/CommandBar";
import SearchBar from "@/components/SearchBar";

// ! Some NextJS boilerplate code removed to minimize surrounding code for ease of reading

export default function RootLayout({
  children,
}: {
  children: React.ReactNode;
}) {
  return (
    <html lang="en">
      <body>
        <main className="flex min-h-screen flex-col items-center  p-24 gap-4">
          <Link href="/" className="text-4xl text-rose-800">
            Sample The Art Institute of Chicago's API
          </Link>
					<SearchBar /> // 👈

          {children}
        </main>
      </body>
      <CommandBar />
    </html>
  );
}
At this point we won’t see any change to our application. We need call window.CommandBar.setFormFactor in order to have CommandBar render inline. We’ll add this to the useEffect callback function in the CommandBar component.
window.CommandBar.setFormFactor({
  type: "inline",
  rootElement: document.getElementById("commandbar-inline-root") ?? "",
});
Now our SearchBar is visible in our app. When we click on the search bar the CommandBar opens below it like an inline dropdown. For more details on CommandBar form factors, refer to the CommandBar form factors documentation.
Finally, we’ll add the ability to toggle the distraction-free mode.
Adding distraction-free mode
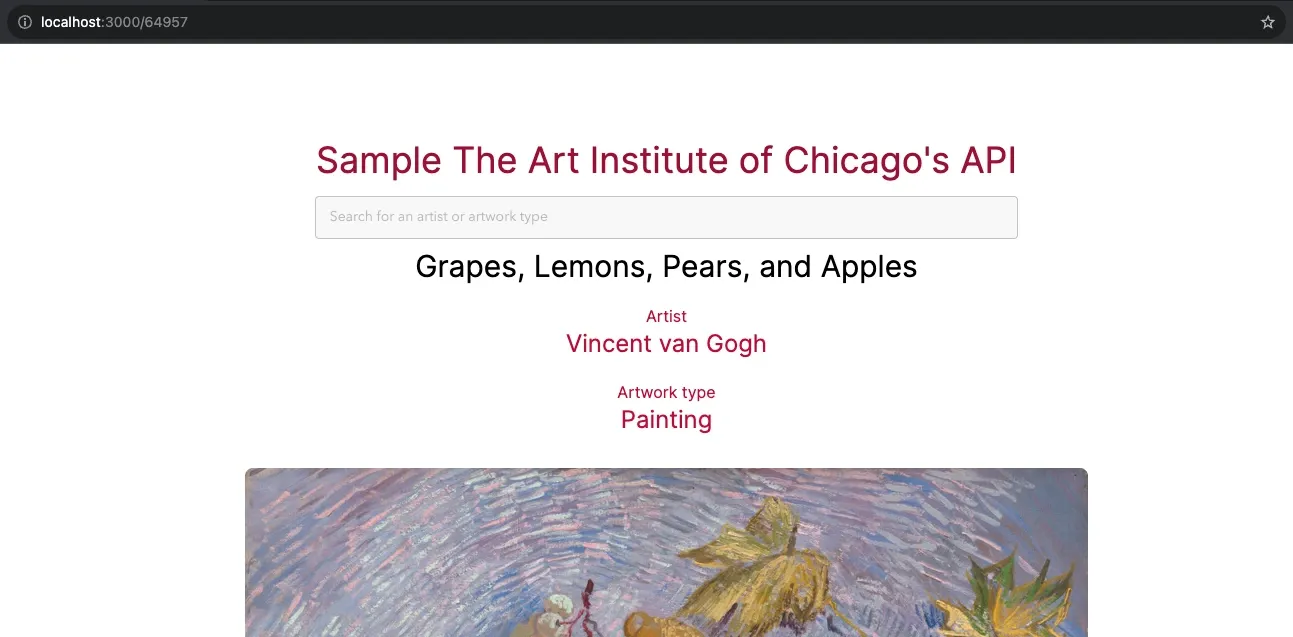
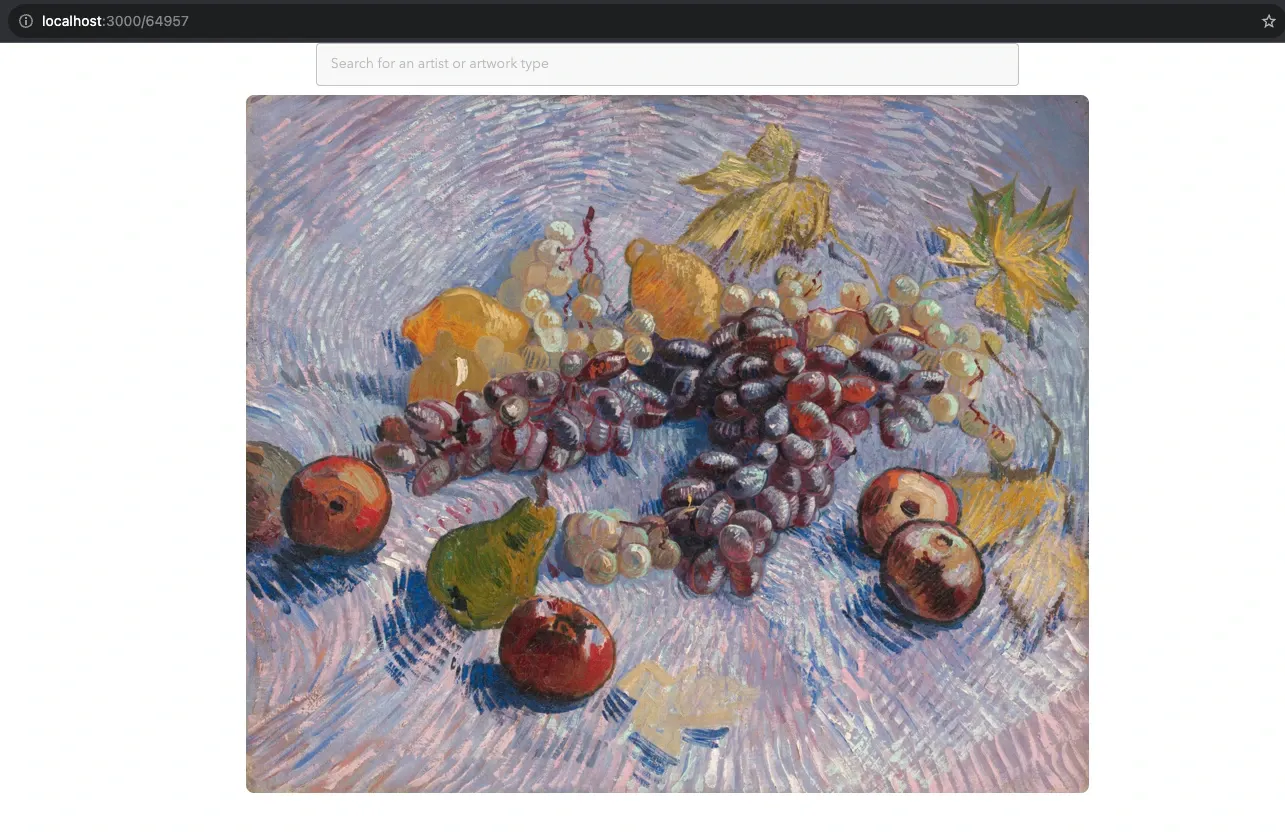
The last feature we’ll add is being able to toggle distraction-free mode. Distraction-free mode hides text that is visible when viewing a piece of artwork. We have functionality to set a key-value pair in local storage with the key being “mode” and the value being either “default” or “distraction-free”.
// File: /utils/useDistractionFreeMode.ts

"use client";
import { useEffect, useState } from "react";

const useDistractionFreeMode = () => {
  const [mode, setMode] = useState("default");

  useEffect(() => {
    const modeFromStorage = localStorage.getItem("mode");
    setMode(modeFromStorage || "default");
  }, []);

  return mode;
};

export default useDistractionFreeMode;
We can use this hook and returned value to conditionally show or hide text. The screen captures below show default mode and distraction-free mode.
We want to be able to activate or de-activate distraction-free mode using CommandBar. We can do this with a “Callback” action type.
First we’ll register two callback functions - one to turn distraction-free mode on and one to turn it off - with CommandBar so we can reference both callback functions in our command details. We will add another useEffect to our useDistractionFreeMode hook. In the useEffect we will call:
window.CommandBar.addCallbackwith “useDistractionFreeMode” as the callbackKey param and a simple function that updates the “mode” value in local storage to “distraction-free” andwindow.CommandBar.addCallbackwith “clearDistractionFreeMode” as the callbackKey param and a simple function that updates the “mode” value in local storage to “default”
"use client";
import { useEffect, useState } from "react";

const useDistractionFreeMode = () => {
  const [mode, setMode] = useState("default");

  useEffect(() => {
    const modeFromStorage = localStorage.getItem("mode");
    setMode(modeFromStorage || "default");
  }, []);

  useEffect(() => {
    if (window.CommandBar) {
      window.CommandBar.addCallback("useDistractionFreeMode", () => {
        window.localStorage.setItem("mode", "distraction-free");
        // in a real app, you'd probably want to use a provider so all components using the mode value can update
        window.location.reload();
      });

      window.CommandBar.addCallback("clearDistractionFreeMode", () => {
        window.localStorage.setItem("mode", "default");
        window.location.reload();
      });
    }
  }, []);

  return mode;
};

export default useDistractionFreeMode;
We will call the hook in our CommandBar component so the callback functions are registered when CommandBar boots.
"use client";
import { useEffect } from "react";
import { init } from "commandbar";
import { useRouter } from "next/navigation";
import sortObjectsByBestMatch from "@/utils/sortByBestMatch";
import getFeaturedArtworks from "./getFeaturedArtworks";
import getIcon from "./getIcon";
import useDistractionFreeMode from "@/utils/useDistractionFreeMode";

if (typeof window !== "undefined") {
  init("MY_ORG_ID");
}

const onSearchArtists = async (query: string) => {
  ...
};

const onSearchArtworkTypes = async (query: string) => {
  ...
};

export default () => {
  const router = useRouter();

  useEffect(() => {
    window.CommandBar.boot("");

    window.CommandBar.setFormFactor({
      type: "inline",
      rootElement: document.getElementById("commandbar-inline-root") ?? "",
    });

    window.CommandBar.addRouter(router.push);

    window.CommandBar.addRecords("artists", [], {
      onInputChange: onSearchArtists,
      labelKey: "title",
    });

    window.CommandBar.addRecords("artworkTypes", [], {
      onInputChange: onSearchArtworkTypes,
      labelKey: "title",
    });

    getFeaturedArtworks().then((records) => {
      records.forEach((record) => {
        const icon = getIcon(record.material_titles);
        window.CommandBar.addCommand({
          text: record.title,
          name: `featured_artwork_${record.id}`,
          icon,
          template: {
            type: "link",
            value: `/${record.id}`,
            operation: "self",
          },
          category: 14786,
        });
      });
    });

    return () => {
      window.CommandBar.shutdown();
    };
  }, [router]);

  useDistractionFreeMode(); // 👈

  return null;
};
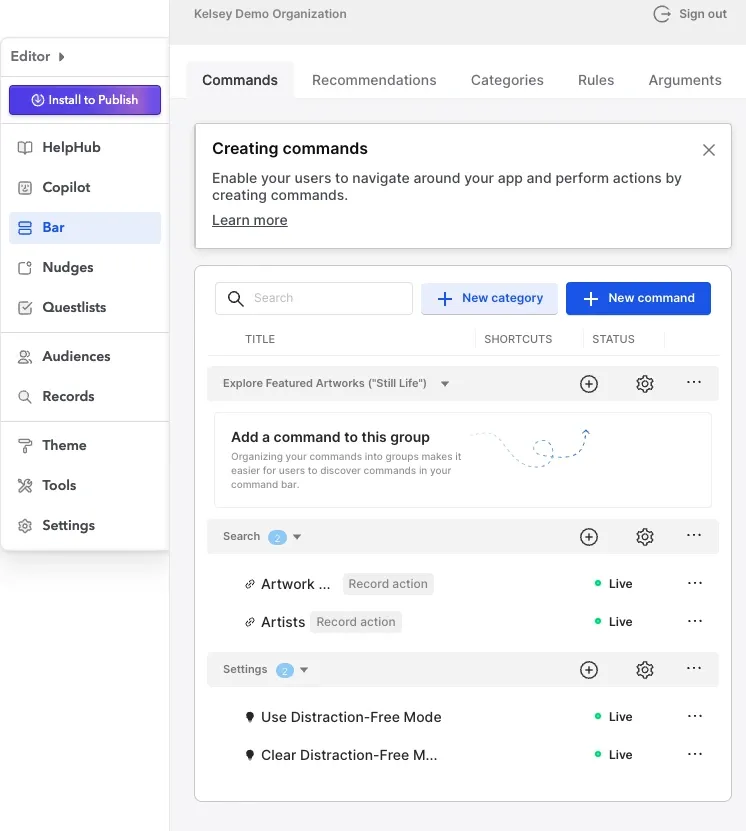
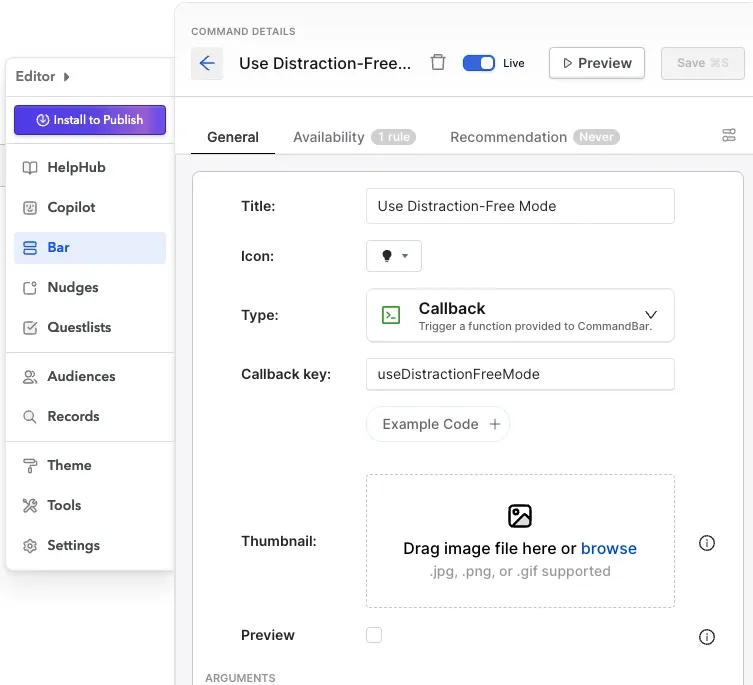
Then we can add two commands in the CommandBar studio below a category of our choice (”Settings” in this case). We’ll make the Type of each command “Callback” and the Callback key “useDistractionFreeMode” for one and “clearDistractionFreeMode” for the other. We’ll also set the Title to match the Callback key (”Use Distraction-Free Mode” and “Clear Distraction Free Mode” respectively).
Now we can turn distraction-mode on and off from the CommandBar!
Check out all the functionality we’ve added with minimal code using the CommandBar studio and the CommandBar SDK.
Next Steps
To learn more, check out the resources below!
- CommandBar documentation - https://www.commandbar.com/docs
- CommandBar Developer documentation - https://www.commandbar.com/docs/dev/data
About Scope3
Scope3, the industry’s leading collaborative sustainability platform, is on a mission to decarbonize media and advertising. By modeling the complex digital advertising supply chain, Scope3 helps brands measure and eliminate digital waste to reduce carbon emissions from advertising and increase the efficacy of advertising investment.
Ready to make an impact in sustainable advertising tech? Scope3 is actively building its team and searching for individuals who are enthusiastic about creating a greener future. If this sounds like you, check out our current openings.